| How to Equip Earthbag Walls with Windows by Ghost |
When the walls of our new home reached nearly four feet in height, it was time to stop filling earthbags for a few days. Stucco netting was run around the lower courses of bags to protect them from destruction by the sun's UV rays, and then the window project was tackled.
Having settled on two windows in each wall, or a total of eight sliders obtained at decent prices from Home Depot, the framing and mounting process was broken down into a series of specific steps as follows: 1. Check and adjust the level where a window would be installed. In one spot, this required adding an earthbag with only two shovels worth of dirt in it. In every other case, thankfully, the mounting area was close enough to level already that a bit of extra pounding with the edge of a board was enough to even things up.
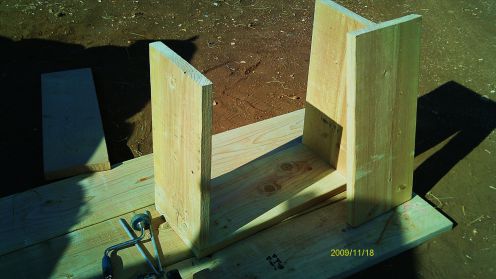
2. Using a tape measure, carpenter's square, and handsaw, cut four pieces of 2" x 12" planking, two of them three inches longer than the other two--which would then go together to form a perfectly square "box". 3. In one of the longer pieces, drill two holes for later use, using a 3/4" brace and bit ...but drilling these holes only 1/4" deep (explanation shortly). 4. Fire up the big generator, grab a power drill with a 3/8" bit, and using the centers of the shallow holes as guides, drill through the board. 5. Nail the four pieces togther with 10d nails.
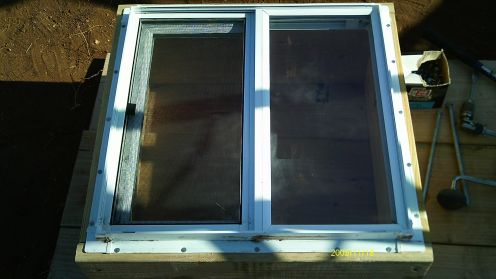
6. Grab a window, remove the stickers, place the window (down side down, duh) in one side of the "box", and punch plenty of pilot holes (using a 10d nail as a center punch). The windows I'd selected have a nailing fin and are meant to be applied in this fasion. How many holes are "plenty"? I go by "feel"; in this case, that worked out to 20 holes, each about 5 inches apart, for a two foot square window. 7. Drive short roofing nails in the pilot holes to secure the window.
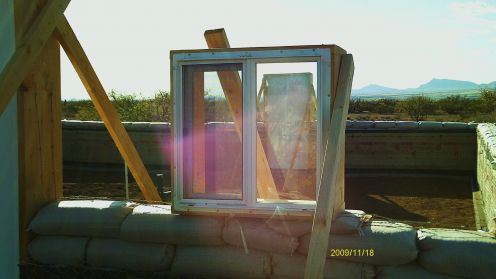
8. Before mounting the boxed window, arrange a string--secured at the wall corners--to help with lining the window up properly with the wall. There's no such thing as a straight line in an earthbag wall, so the string serves as a necessary guide. 9. Set the boxed window where you want it, applying one brace for the moment. In this case, 2" x 4" boards in 8 foot length worked best, tacked to the window box wood with 8d nails for easy removal. 10. Drive a foot long, 3/8 thick, 100d galvanized steel spike through each of the predrilled holes in the bottom board and down into the bags themselves. Each spike penetrates two layers of bags below the board plus a bit of a third layer, which makes the box quite secure. The shallow 3/4" holes allow the heads of the spikes to be countersunk, making a smooth surface. 11. Add the second brace. The first one was placed going away from the outside wall; this one goes away from the inside wall. This arrangement makes everything sturdy enough to stay in place until the final "lockdown" steps (which have to wait until the earthbag levels reach the tops of the window boxes) can be completed.
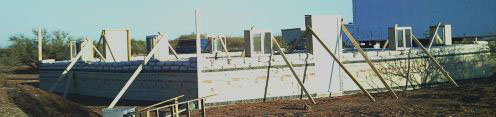
12, And...repeat the process. All eight windows ready for action. |