| Our Little Thing by Paul and Konomi Coleman |
This house in Patagonia was built by my wife Konomi and me and is made of earthbags, filled with the earth next to the house, and features a double wall system that includes pumice from an explosion of the now dormant Melimoyo Volcano ten thousand years ago. Five hundred tons of earth have been moved by hand and everything that has been used to build the house has come up a very steep 150 meter hill on the backs of ourselves and friends. The house has a spectacular view, is very cozy and has a very simple exterior, beneath the earth system, which keeps the surrounding earth warm and dry in what is an extremely wet and windy environment. The warm earth beneath the house, and the surrounding turf walls, warm the house to the extent that much less firewood is used to bring the house to a very comfortable temperature. As the house ages, the heat stored beneath the house will mean less and less firewood.
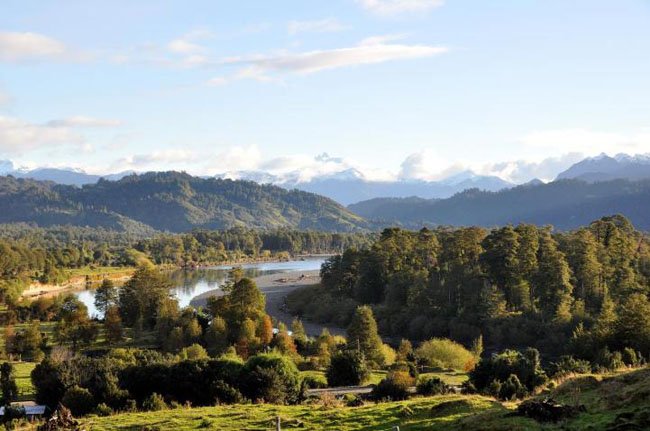
The house is very quiet and has been designed to capture the magnificent view of a mountain valley where two mighty rivers meet, and to fit into nature.
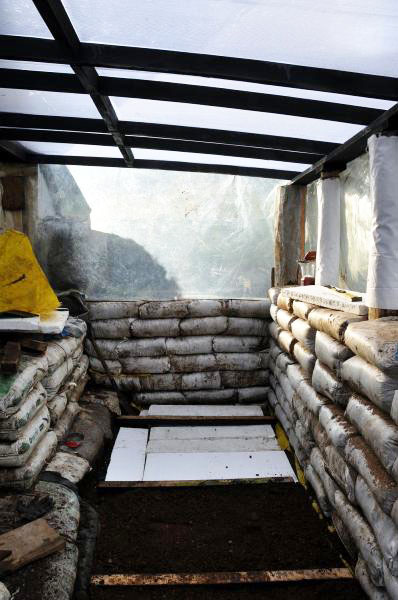
Earthbag forming box. Took us two days to make it. Put the bags in the box, pack the soil and tamp. Beautiful cubic square comes out. Lay in line and tamp them. We must admit it was a hard work to use a 50kg sized bag. Our two days worth of work - wooden earthbag form - was broken in a day! However, we found 50 pieces of 25kg sized bags among 1000 bags. Wow! We managed to get a grip on how to make a solid bag with 25kg sized bags in the last few days. We fixed our once broken earthbag box for 25kg sized bags, and viola!! It made a perfect earthbag. "Earthbag Building" is essentially to make solid blocks by putting soil in polypropylene bags, tamping them and laying them down like blocks or bricks. The walls are about 40 cm wide and they are good insulation. Earthbag walls will regulate the temperature and save us heating/cooling cost by storing heat from the sun during the day and releasing it during the night. If we use stone or rocks for the floor, the floor stores heat during the day and releases it during the night. This "passive solar effect" will keep us cool in the summer, and warm in the winter. Construction is relatively inexpensive. The main materials are polypropylene bags, soil and barbed wire. Plaster for interior/exterior will be natural materials such as earthen plaster - straw and soil mix. If you can get a perfect soil for earthbag walls, they are free!! Misprinted polypropylene bags can be purchased at a reasonable price. If you want to use the used bags, you need to have a perfect soil and bags in good condition so that you don't have to worry about the bags crumbling and soil falling. Barbed wire can be very cheap. We originally decided to build an earthbag home because of its low environmental effect and low cost. However, once we started living in Patagonia, we started to think that it might be beneficial for locals. The other day, a local youth, Matias who runs the internet cafe in town came to see our earthbag making process with his fiance, Margareth. Margareth was very interested and said "It is very sad that we are losing indigenous forests in Patagonia. We are very interested in an earthbag home because it uses less wood and would not contaminate the environment." They said they would build an earthbag sweet home when they get married.
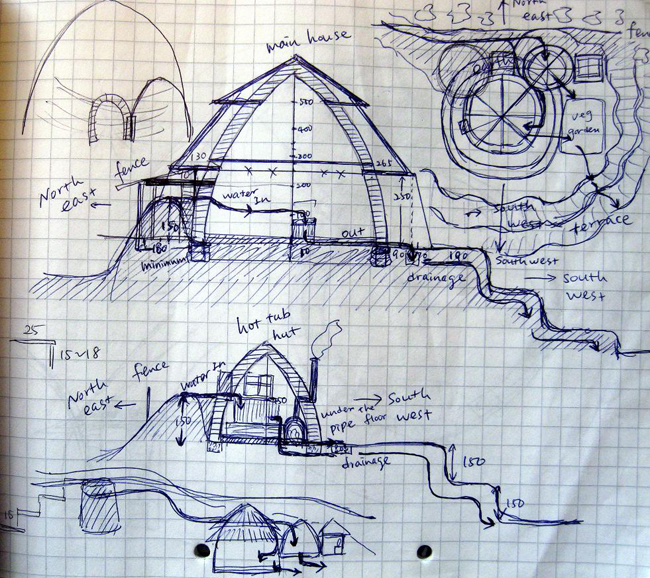
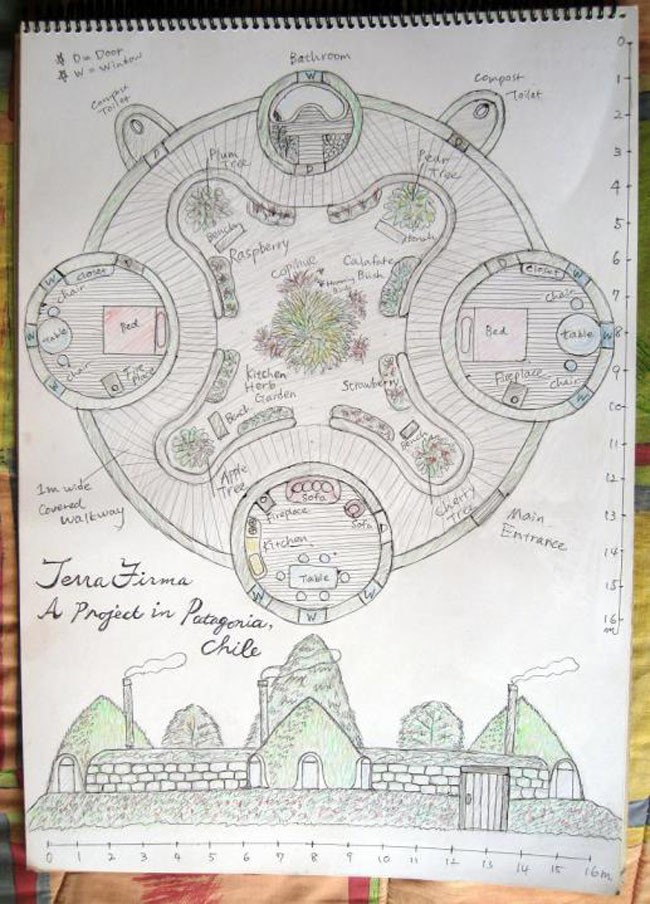
About a year ago, we came to this land and designed our two bedroom house with a conservatory. We were going to build four domes and surround them by curving walls. However, we realized that it would take longer than we thought, so we decided to build small domes first to live in. First we will make a three meter dome, which is going to be our bathroom, then six meter dome for living space. Where do we place these domes? Whereabouts on our land? Somewhere we have excellent drainage, spectacular view and the most important thing is...somewhere very close to the place where we get the earth from to fill the thousands of bags. In order to make two domes, Paul figured that we needed to have 2000 bags and more than fifty cubic meter of earth. That means we are going to have one meter x fifty meter trench or two meter by twenty five meter trench after we dig all earth we need... Then what shall we do with that deep and long trench?? We took our time to draw many design plans of our domes. Then we went to our land to find the most appropriate location, changed our design a few times. We finally decided the location of the domes. Now we are ready to dig !! We marked the location of the domes and did a simple ceremony. We lit a bunch of white sage. Paul said a simple prayer..."We are very happy that we found this land. Thank you, Earth. By us living on this land, we wish that all life on this land may flourish...." Then a strong wind came and the big bunch of white sage was burned out. After that, we felt that we did something very important. Somewhere deep down in our heart, we were thinking that we should talk to the earth before building our home. So we greeted the earth, letting her know we were moving in!
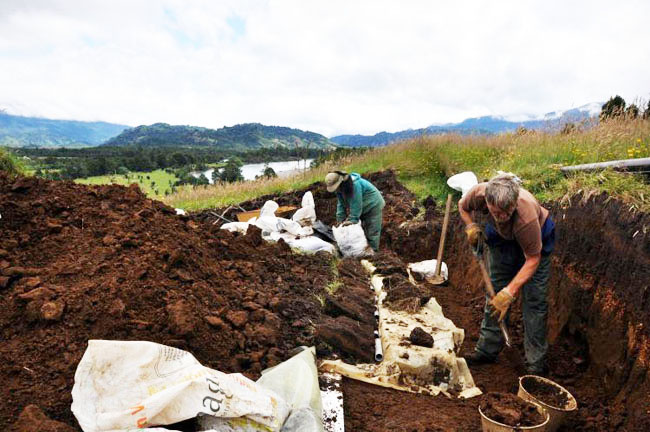
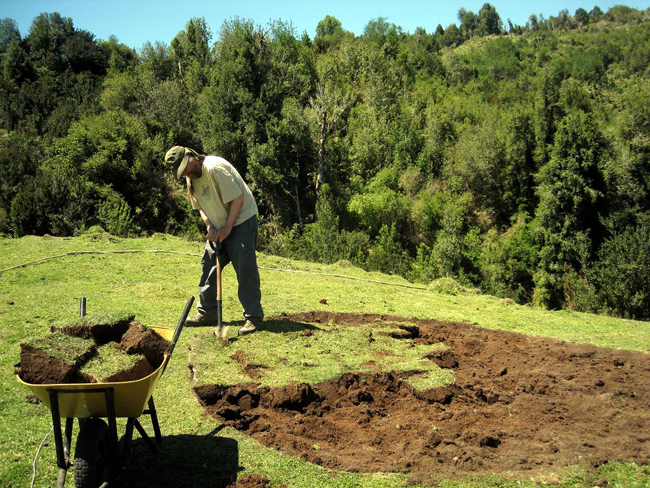
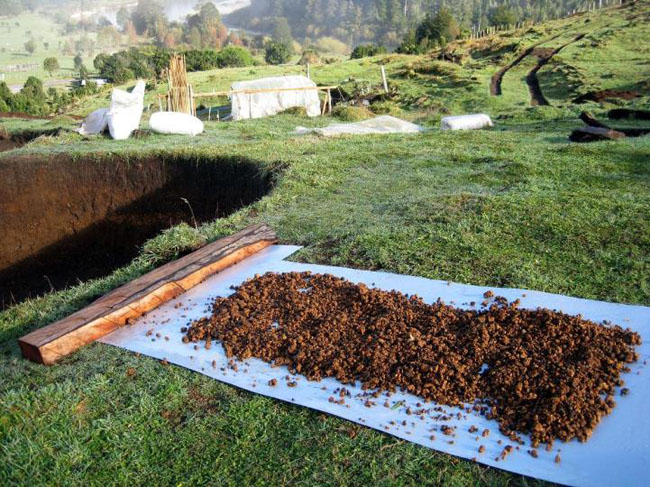
We removed turf from the surface and the top soil which was 50cm deep. We don't use top soil for earthbags because organic matter might grow out and break the bags over the years. It took us six hours to take out entire top soil.
Underneath the top soil, we found a layer of orange pumice from an eruption of Melimoyu Volcano thousands of years ago. Pumice is ideal for insulation because it has lots of tiny holes containing air. Paul has always been thinking about using pumice for earthbags. So we decided to the mix pumice contained in the soil and the clay which we found beneath the layer of pumice. Because our domes are to be built on the slope of the hill, we want our dome floor to begin 50cm under ground as the earth provides excellent insulation... in places we need to dig up to almost 1.3 meter deep, which produces a lot of soil. "I know what we'll do!" Suddenly a light bulb was lit over Paul's head. "We are going to dig and use the soil to fill the bags on the spot! Then we don't need to worry about transporting the soil from somewhere else and what we are going to do with the trench that we would have had to dig."
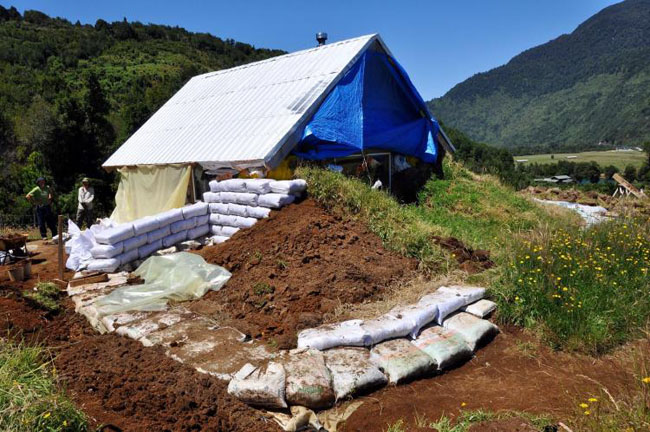
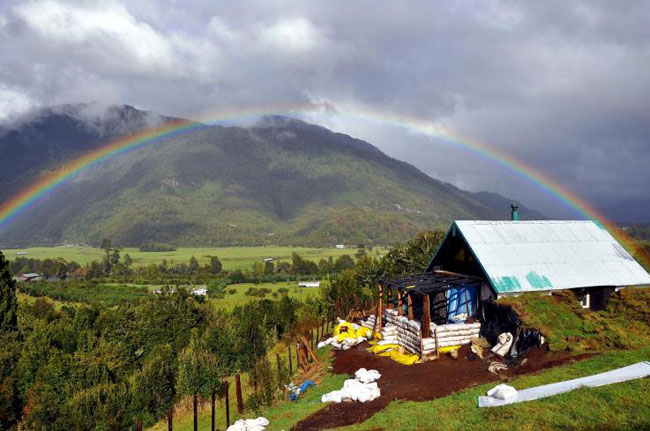
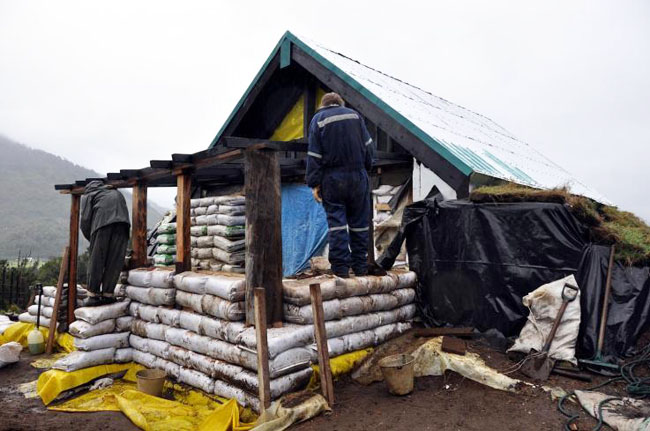
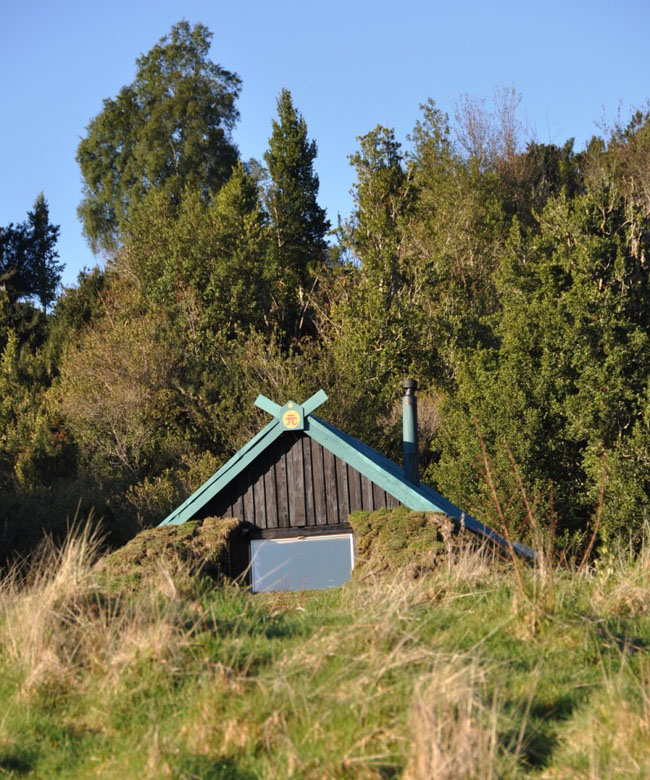
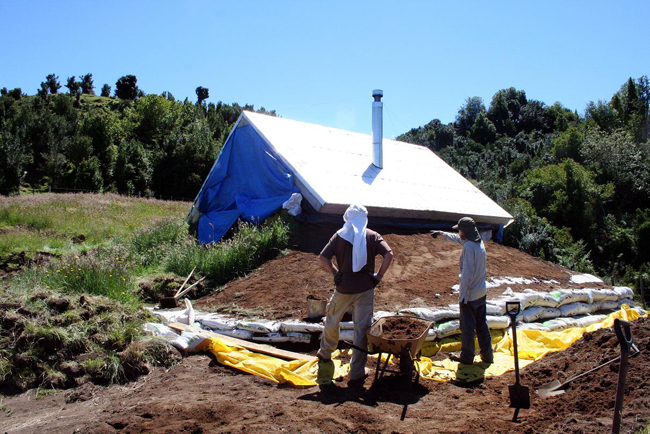
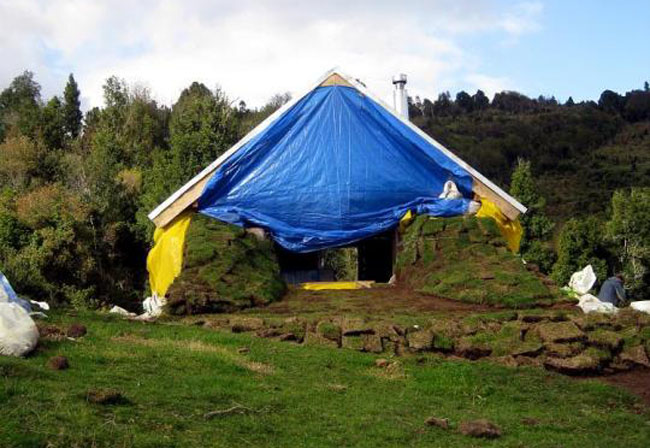
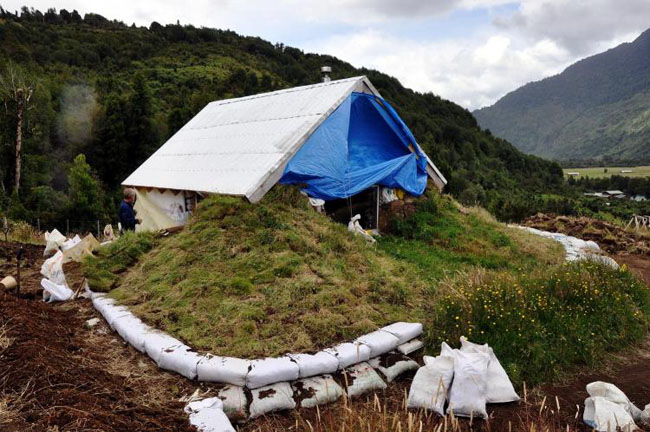
In March, we are expecting four Japanese guys to help build our house. So because of the inclement weather which has slowed us down, we've changed our plan... now we're going to temporarily halt work on the dome to build a cabin for them to sleep in. This cabin will be made with earthbag walls and a typical Chilean wooden roof. On the outside of the cabin we will install turf/sod to protect the walls from rain and to help keep the heat inside. When we dig the foundations for the cabin we will remove the turf in square blocks, install them in pairs, with one grass side facing to the wall and the other facing to the air. In this way the roots will knit to each other to create a thick blanket of organic warmth with very water resistant capabilities. Although our particular form of constructing this turf wall is unique, people lived in Iceland in turf houses for many hundreds of years. Sod houses can also be found in Scandinavia and one is even in Punta Arenas in Chilean Patagonia, the gateway to Antarctica. (Photo above is of an Icelandic Turf House. Our cabin will not be exactly the same as this, but we are going to apply some of these techniques.) We think this will be very beautiful as the walls will be covered with flowers in the summer and the cabin should look like a flowery meadow. From far, it might not be so easy to notice. It would be nice to have a turf roof as well. However we will not be able to do it this time, as we would need a much stronger roof structure to support the weight, but we intend to use turf to cover the entire three meter dome as the earthbag structure is much sturdier . (Later, we changed a design of the cabin roof for much stronger structure to have a green roof.) When we finish our first earthbag cabin, we will build another one for us so we can spend winter on the land. Our original plan was to finish our dome house before winter (July), but this is Patagonia. 21 days in the Life of a Patagonian Cabin Video Building with earthbags in Patagonia is making us increasingly flexible. It's been raining almost 90% of the time and it is difficult to work outside in stormy weather, plus we've had to get used to the Patagonian slow way of life. For example, if we order materials from the shop, they say "It will arrive on Friday." But they don't tell you which Friday! Often it takes weeks to get stuff to our land, and although our plans are practical, practical is not necessarily applicable here, so changing the plan becomes the norm. Which makes life very interesting. The more we change our plans, the better ideas we come up with. We've become very good at making things simpler. We create new ways to reduce material cost to the minimum to get maximum outcome, to make a greener and more comfortable house. When we get stuck or things are not moving on, we see this as a sign for change. Every time we change our plan, we find ourselves more creative and innovative than before. It was never our intention to create two cabins and two domes on this land. However, it looks like we are going to have several different types of earthbag buildings using lots of unique ideas and alternative technologies. Well, when we started this project, we had a dream. Our dream was to be able to show people all over the world that we can live a sustainable and comfortable lifestyle in the way which is good for the earth and good for the people. So perhaps it is good that life in Patagonia can be a little difficult as our dreams and our realities only seem to grow.
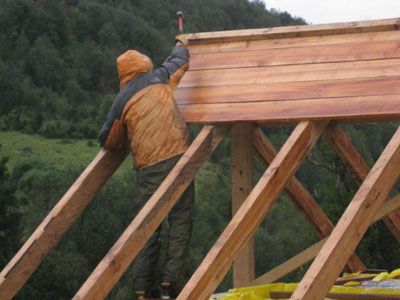
First, saw 70 pieces of wood. Nailed into the roof structure. The wood was all hand-cut by our friend Lucio, so they were bent in slightly different width. That made it difficult to fit one after another. After a while, having tried to fit them well, we gave up! Well, this is Patagonia and we like something different anyway.
1) The roof has to be strong enough to support green roof. We had many issues and solved one at a time. Tried out different ways and finally sorted out the most appropriate way of making our roof. We nailed pine (2 x 3) across the roof, 50 cm apart to place 1 inch thick Polystyrene. To avoid condensation, laid vapor barrier papers on the wood, then leave 1 inch air space before placing polystyrene panel. On top of polystyrene panel, we laid another layer of vapor barrier paper to avoid condensation between polystyrene and zinc roof materials. We thought about a lot of possibilities for the roof material but zinc (tin) is the best and easiest to obtain here in La Junta. We have 3000mm rainfall a year and everyone has tin roofs.
Then here we are! We put plastic around the walls to protect them from UV, rain and cold. Our next challenge to protect walls from freezing.
Now we have a roof and walls and temporary doors and windows, we're sleeping a few nights a week on the land - and enjoying every minute. Konomi is plastering, I'm wood working, and building. Winter has come to Patagonia. Snow is getting closer, ice in the pond, and big frost on the ground. It is fun walking on the frost, but it is not good for the earthbag walls because they might freeze. Soon we will have a fire place and chimney installed then we won't have to worry so much about our wall freezing.
Paul made a frame for the chimney and three of us installed a fire place. It was difficult and it took us all day until after dark. However, full moon helped us, illuminating the roof and chimney. Mayumi said, "the moon is shining on us saying you should get it installed today".
The next important job was to make a center post. Paul hand sawed and chiseled. He is getting very good at it. The post fit very well and is strong. The next wall is to protect the first wall from cold weather and sun, and this is going to be a base structure for our turf wall. We're presently doing the foundations, which means moving earth from a mound in the way of our future view, to the base of the west front wall where the first turf will be placed - so digging is an extremely muddy affair. It's taken three afternoons of digging and leveling, but if all goes well tomorrow should see the first of the supporting earthbags for the turf and the ground insulation which is a layer of thick plastic - this three meter undercover insulation will keep the earth around the house warm and dry and in a year or so, the heat should start to rise up and into the house - thereby reducing our heating costs. I believe that all of our heat energy saving efforts should mean that we consume one fourth the wood as anyone in the village.
Konomi is at home, drawing the plans of the four dome home we plan to build with Yuji. The design is of four domes and a courtyard and when people see it I am sure they will be reminded of a fairytale world. It will fit in with the view and will disappear among the surroundings. Most of the materials will come from very close by. Amazing how things work out - not even finished one, yet already designing another - we love building things with the Earth. Very hard, but very rewarding. We will begin this some time next year, after we've move into the cabin. It's amazing, we've worked so hard this last year, yet still want to build more. Ultimately our goal is to create a community of like minded people, wanting to live with nature in a harmonious way. We hope to lead workshops and to introduce this glorious valley to as many people as necessary to save it - four glaciers feed our boundary river and the magnificent ancient surrounding forest.
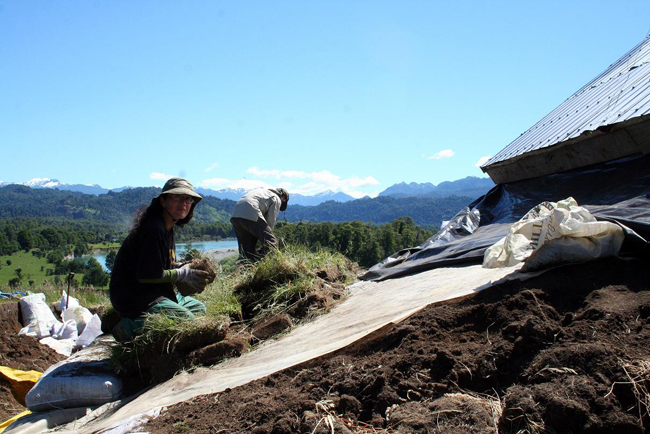
I moved masses of earth to form the foundation of our south side turf wall - will be building retaining wall and drainage system tomorrow and then begin laying turf the next day. Excited to see how it looks when finished. It`s taken months of waiting for the Turf Wall. Months of wondering how it would look, how it would be done. Months of searching the web for ancient and new methods and then finally doing it with no plan - just totally organic. Take a step, stand back and go `Hmm? What next?` Because the wall is not quite like any other turf wall, Icelandic, Norwegian, US plains style, it had to be this way. Once I got used to the plan of no plan the whole process became much easier, no more nights thinking, "How I am going to do this. Do that?"
So, we built it one layer at a time. And are very impressed - as soon as I entered to close the house after completing this first section I noticed a difference in the vibration. I felt very much comforted, as if I was in some sort of gigantic friendly cocoon. Later we will explain the layer process, and how we have incorporated the Passive Annual Heat Storage (PAHS) system advanced by John Hait, and utilized the ancient forms of Turf Roof construction along with the modern methods used in Germany and advanced by CAT, the Centre of Alternative Technology, to build our Turf Wall.
We have been stacking turf everyday for the last month and finally our turf wall is coming along nicely! Now almost all of the front on the first floor is covered with turf. Two weeks of nice weather helped us a lot
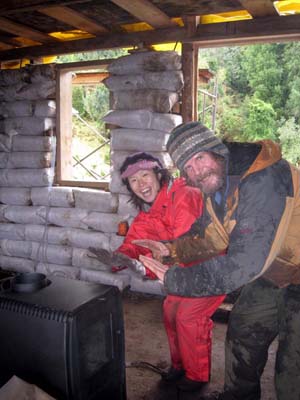
We had a fire today in the house, and it was incredibly warm!! It was like a sauna. Eventually, we are going to build turf walls all around the house. There are approx. 3000 earthbag houses around the world, and there is only one in South America. We think there is only one with the turf walls in the world.
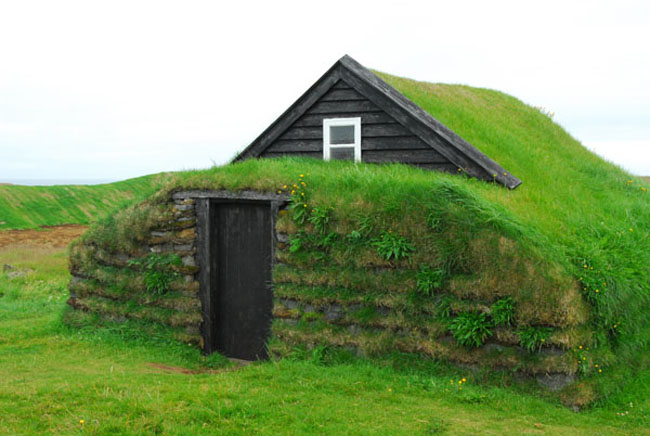 Above is the Icelandic turf house built in 1855. We really admire this natural looking lovely house. Above is the Icelandic turf house built in 1855. We really admire this natural looking lovely house.
We carried our three insulated windows up the the hilltop and installed them temporally into the now very well knitted grass walls. We were all very impressed and now spend almost every day staring out of the windows at the glorious view.
This south facing turf wall is massive, because it has to protect us from the winds that blow up from Antarctica during the winter periods and will end up using forty tons of earth, all moved by hand. Beneath lies a very uncomplicated Passive Annual Heat Storage System- we call it A SOLAR UMBRELLA. It's polystyrene, one inch deep, set beneath thick plastic sheeting. The three meter blanket that extends all around the house is slightly sloped out, to take away the water that falls from the skies and to create an upside funnel, so that the heat from the sun that is gathered by the earthbags and by whatever heat we generate to dry the walls and warm the house, can travel upward and into the house when winter comes in and the air grows chilly. We're already noticing this heat effect when we remove any of the temporary covering that we've used to keep the outer walls dry during construction.
A heavy earthbag retaining wall keeps everything up and the plastic used to shelter the house during construction now finds use beneath the top two layers of Turf and acts as drainage. Eventually the drainage will be fed into water cisterns, which will in turn be used to feed the permaculture food forest we will be creating. By mid month we hope to have the whole house turfed up.
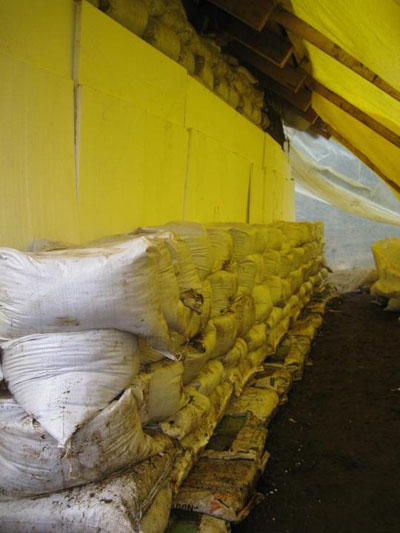
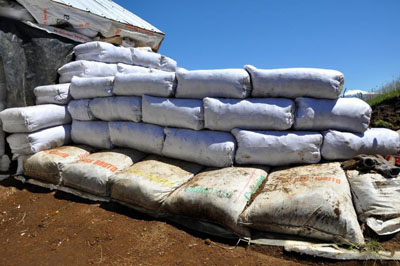
The North West corner turf wall is almost finished. Soon turf will be placed over the earthbag retaining wall to protect the bags and to provide a footpath. Already the house is disappearing into the scenery. I am creating terraces while covering the retaining walls for the turf we've piled around the house - these will eventually become out house food garden and should look very pretty. Konomi loves gardening and can hardly wait to spend more time with the plants. We've used 1000 recycled polypropylene bags in the construction of our house. We have used them as retaining walls, as temporary door covers, for stuffing up the gaps between the roof and the walls during the winter months while we waited to plaster and even to make supports for our polytunnel and to build our outdoor toilet, but the other day at the La Junta fiesta we saw another use - for helping to guide cows to places they don't want to go like branding fires or rodeo's.
Next we build a small retaining wall, to stop the bags and all the earth which will be piled on the sloping plastic and polystyrene, and to create a suitable place for pipes, which have been cut into small pieces, to allow water to run away from the turf wall and to ensure that the heavier earthbag retaining that will cover them does not block the drainage.
Then we lay gigantic earthbags to shore up the turf walls to ensure the weight does not slip away from, or into the house. And also build another wall next to the house to keep the extra weight of the earth and turf off the house, which means that we now have three walls around the house - lots of work, but we want to feel very secure and we do! Eventually we will cover the roof with Maiciya, the ten thousand year old volcanic rock we find a meter below the surface of our land. Then we should really disappear into the landscape. Now we are putting on a greenhouse addition to the north side...
|
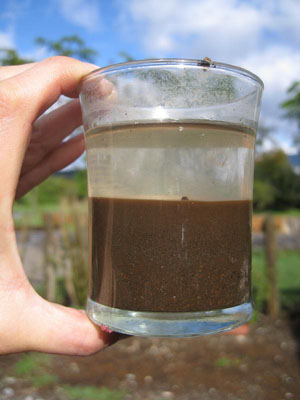 Vital materials for earthbag - soil. 25% to 30% clay in the soil is the best mix. We tested our soil in a glass of water by leaving it overnight. Clay rose above the soil/sand and we could see the clear line. Wow, our soil had 25% of clay in the soil. Perfect mix! Thank you God. Another experiment. Make a ball with the soil, drop it from your shoulder height. If they are not broken, it is appropriate mix for earthbag walls.
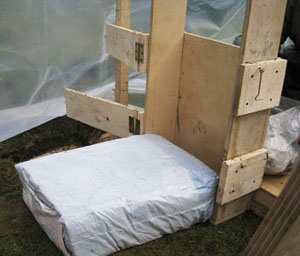

 After we finished our roof structure and all the volunteers had left in mid April, we had rain almost everyday. Paul did almost all the roofing work and it took us one month...and finally we did it!
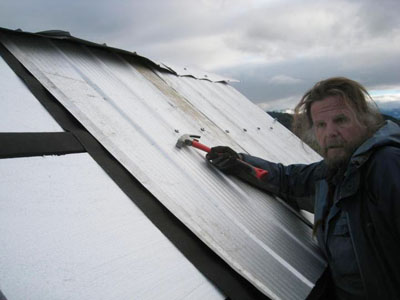 The challenges we faced were...
 We compacted the floating gravel foundation for our earthbag walls. In the peace and quite of a breezeless day Konomi and I laid the first bags. Now all we have to do is pray that the wood turns up before the carpenter from San Francisco arrives. Already it is two weeks late! Life in Patagonia... flying by the seat of your pants with a shovel in hand. Wonderful, truly wonderful!
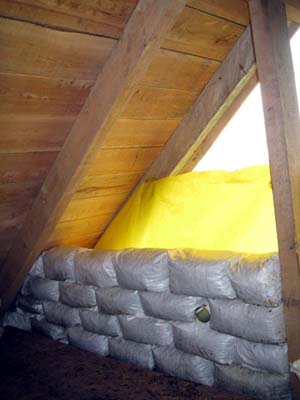 We are going make a wall for the 2nd floor with volcanic rocks which are very light with lots of holes with air which work well as insulation. We dig the stone, wash it in a pond in the strainer, then we dry them for a few days in the wind and put them into the polypropylene bags to make walls. Yes, it takes time. However, hand digging the stone makes me feel very humble, makes me feel that we are given materials for our homes by the earth. Our earthbag home surely geminates a heartwarming, comfortable vibration.
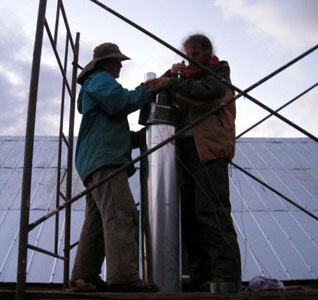
 Then, next morning we had the first ice on the ground. Phew! We put on a fire and warmed up the walls and celebrated our first fire in our new home.
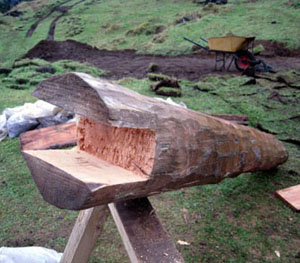

 First we grade the earth slightly away from the house. Then we place the insulation and next the plastic sheeting that will take away the water and allow the earth to become warm and dry. The expanded polystyrene extends at least three meters beyond the house, but will not be used on the floor inside. These things are crucial as the heat the house gathers from the summer sun and the fire will be stored in this dry earth and released through the floor into the house during winter. Following that we pile on a small amount of earth, largely to ensure that the whole lot doesn't blow away in the wind.