| Beth's Earthbag Construction Project |
During the time I was researching the new and improved techniques of Strawbale construction in late 2003, I came across the idea of Earthbags, and got very interested. They are polypropylene flood control bags filled with mud instead of sand, stacked up to make walls, and then covered with stucco or plaster.
They get offset-laid in courses, like bricks, and stomped on/pounded to the desired shape. The mud doesn't need to be very closely monitored for a balance between sand and clay or other things, so it can be done anywhere, using local dirt. The bags don't need to 'breathe' like strawbales, so you can plaster or stucco or cement over them as you like. To keep them from slipping, barbed wire is laid between courses, and for tall walls, rebar is driven through them vertically for stability. The bottom-most course is filled with gravel, to aid drainage. I'm finding a great advantage to these bags over straw bales because I can shape them any way I like, and they don't need a special plaster covering to accommodate air exchange. They are better than brick because, again, I can shape them any way I like, plus I can start on uneven ground and end up with a level wall without going through a huge engineering hassle. I have never worked with adobe, but I hear Earthbags are easier because you don't have to be picky about the mud formula and you don't have to make forms and dry them in brick shapes. I am looking forward to ending up with adobe-like walls that are easy and cheap. Some of the articles I've read suggest for building code, inspectors will more than likely treat this type of construction the same as adobe construction, so I'll be reading up on adobe building codes.
If all goes well, I plan to make our barbeque island of Earthbags, as well as some garden benches and the base for a fountain. Then, who knows, I can even see them as a material to use as a base for sculpture. I can make the bags any size I want.... Here is how my planter project is going: In mid-January 2004, I bought 100 polypropylene flood-control sandbags online for $.22 each. They were 14" X 26", which was too wide for my small project, so I cut them in half... .and reseamed them with a double fold. .because they unravel very easily... ...ending up with 200 long thin bags. Next time, I'll order the bags without the ties on them because I ended up cutting off the ties.
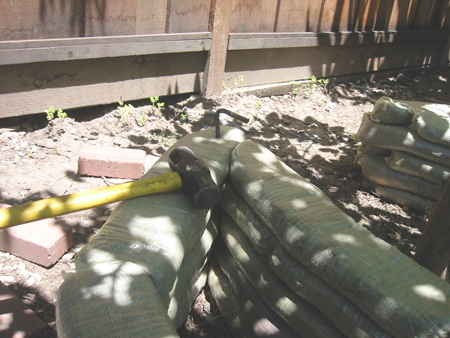
Later in January, I filled several bags with rock for the base course of this inner ring of a planter around my fig tree in the back yard. After filling, I just folded under the top ends and butted them against the bottoms of the last bag laid. For the second course (the three closer, brown, ones in the pic), I dug a pit of loose dirt and watered it, ending up with sloppy mud. My "adobe". I shoveled that into bags with a small spade and laid them on top of the first course, staggering the joints. Then I stomped on them and gave them a few kicks for shaping. I didn't have barbed wire, which is recommended between courses of bags to keep them from slipping against each other, so I tried some snipped chicken wire, which didn't work very well. I searched for barbed wire around town, but only found places that would sell me 3,000 feet at a time. Later, I found a roll of barbed wire on Ebay and won the bid for $1.00, so now I have plenty.
We made a bag stand and funnel that will make filling the Earthbags with mud easier. Here's the whole set up with a bag loaded, ready for mud.
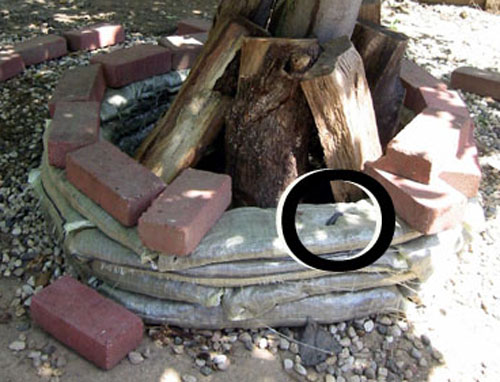
This is the starting inner ring of a circular planter around one of the Fuji Apple trees. It was my learning exercise. In the black circle you can see the bent-over end of a four-foot piece of rebar that I pounded into the ground for stability. These pins are placed about every two feet. Note the wrinkles in the bags and corners sticking out at the sides. Also, you can see strings of unraveled polyprop sticking out. These turned out to be problems when covering the bags.
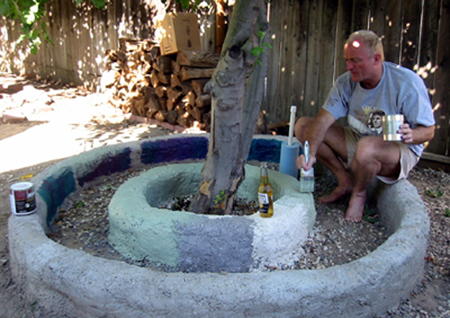
The covering I am using is called hypertufa , which is a concrete that uses perlite or vermiculite as the aggregate rather then rocks. Hypertufa is lighter than concrete or stucco, so it's easier to work with. Here, I used vermiculite, and it felt like there were little pieces of rubber in the mix, making it very lumpy. I used white cement for this bit, stained with black and brown. This was an attempt to avoid paint, but it didn't look very nice, and keeping the stain consistent between batches would have been difficult.
Because there is only one coat of hypertufa, I'm concerned about its strength, so I cover it for at least the first 36 hours of curing time. The white pipe sticking up in the background is a capped-off sprinkler system pipe, which will be hooked up to soaker hose to keep the planter watered. Here is the outer ring curing, and then uncovered. It is narrower than the inner ring because the bags were packed tighter with mud, making them taller and thinner.
We originally had the idea of making the planters look like a plum tree's leaves; dark purple base with deep green highlights. We tried out a few techniques and found the colors too strong. We started playing with a more neutral, muted color of green, but under the influence of Corona, we chose too blue of a color.
My supply of earthbags was running low so I ordered three hundred more sandbags. Here I am cutting them in half in preparation for sewing.
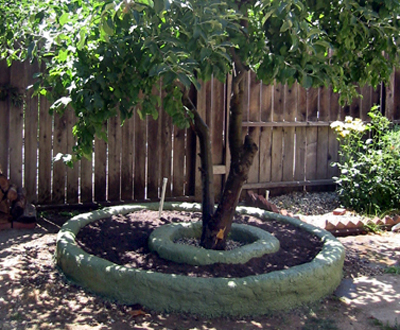
We had five yards of topsoil delivered; we'll fill the planters with it rather than using our natural clay-heavy soil. The only thing left to do for this planter around one of the apple trees is to plant some herbs and flowers.
Here is a corner rebar pin part way in - in the center of the photo. The rebar pieces I used here have blunt ends because we bought them cut to length, and they were impossible to pound through the bags. I took my old strawbale needle and punched holes in the bags so the rebar could pass down through them. Sharpening the rebar is definitely worthwhile, so we'll go back to buying long lengths and cutting them ourselves.
As I got to the next to the last (fifth) course, the walls got a bit unstable, so I put several pins in early. I made sure that I marked where I put them so I didn't try to drive another pin down in the same place after I finished the final course. The last course was a challenge because the walls were wobbly and tilting. I think I exceeded the recommended height for the width of the bags. To help out, I pinned the last course as I laid it, and tried to wrestle the walls straight as best as I could. I might have to do some extra hypertufa-ing to stablize it even more.
The walls are so high that I have to really watch out for sagging - when the hypertufa separates from the bag under it and droops down, cracking the surface. Here I am repairing a sag by pressing it firmly back in. I saved the top for last, thinking I could make it thicker if the sides were in place to support it. I was right, but the shape came out too square for my taste.
I resorted to manufacturing techniques for this big planter; I filled several bags at one time and wheelbarrowed them over to the site.
We're shooting for a variety of colors of flowers and foliage, along with different heights of plants; some will trail over the sides of the planters. |

 My proof of concept project is a series of planters using half bags I've made from full-sized bags cut in half and sewn. I've ended up with two tall skinny bags for each regular bag I bought, which I can kind of snake around for shaping as I lay them.