| The Hermit's Dome by James Fox |
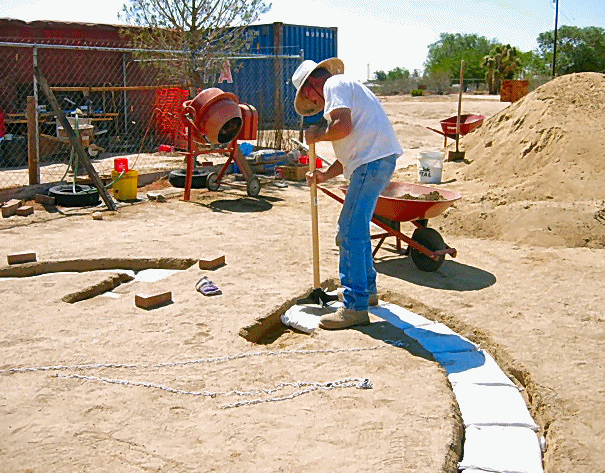
So I started out by buying a book and a DVD that had illustrations and instructions on how do just what I propose to do. I also visited another website www.greenhomebuilding.com , hosted by Kelly & Rosana Hart. They gave me many tips on building with small earthbags. First I needed to buy some equipment and some supplies. An assemble it yourself cement mixer, a big tarp, 500 sandbags, some bricks, cement, barbed wire, a tamper, and hire someone with a bulldozer to dig me a big pile of dirt. This only cost me $706, not bad for an emergency shelter now all I had to do was to start digging a foundation. My daughter became very irate and insisted that I hired someone to dig it. I laughed and said, "You just watch." But, after trying to get through my hardpacked soil I conceded - didn't want to start out with a heart attack.
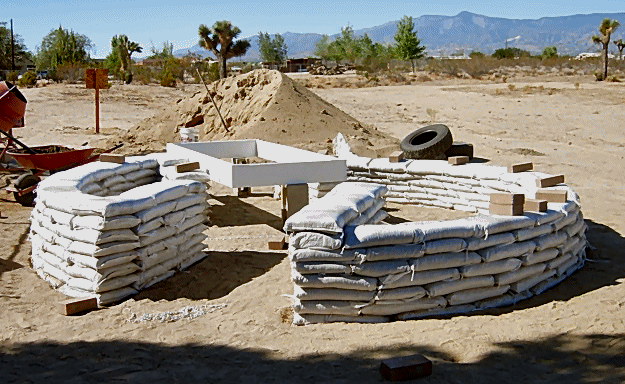
They are hard to see in the photo, but there are 2 chains laying on the ground. One 13 ft. long and is staked in the door opening on the outside diameter of the layout. this is used stretched across the center of the layout an when raised up creates the arch pattern for the bags. The other chain is anchored in the center of the layout and is used along with the arch chain to keep the bags centered as they are stacked.
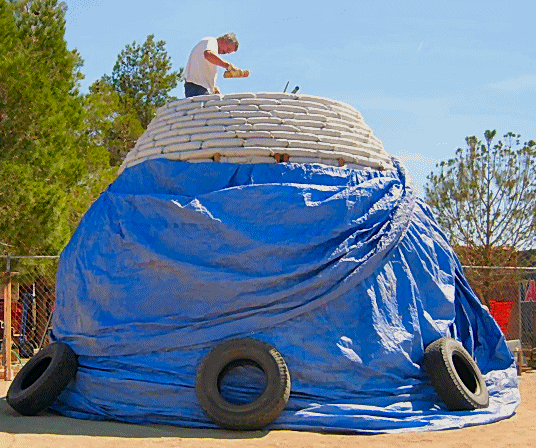
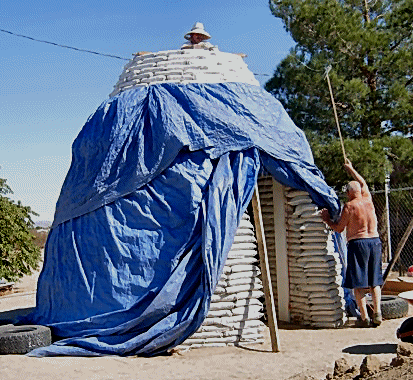
We get 1 complete course including the barbwire between 6 am and noon when it gets too hot to even pick up a tool. It will blister your hands. Then cover everything with tarps. Not only to protect from the afternoon sun, but we are supposed to have heavy rain and thunder storms all night.
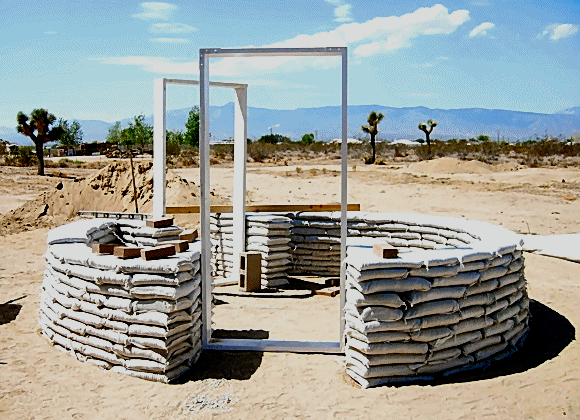
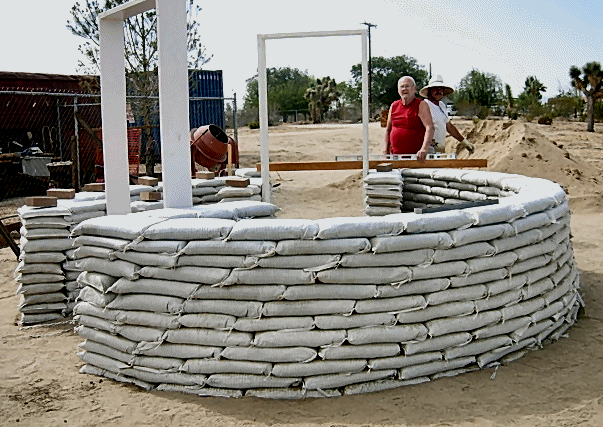
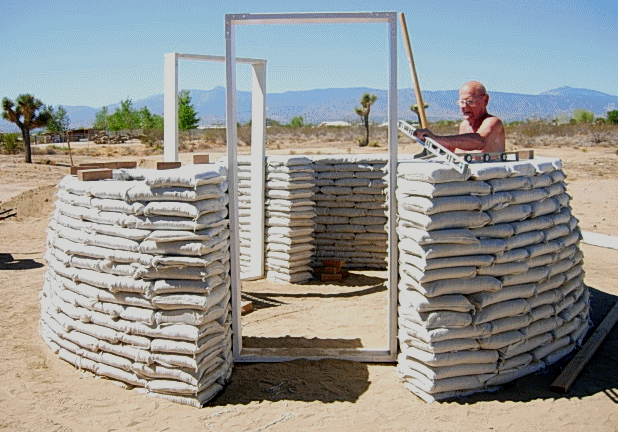
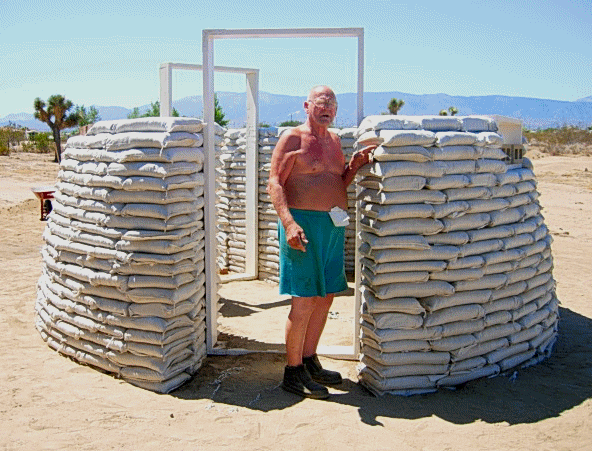
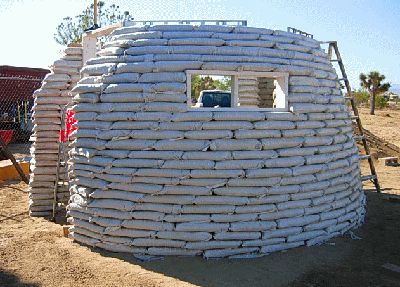
The dome still hasn't started to dome. I used the arch chain and the radius chain streched them tight and found that the dome doesn't really start to curve inwards until 2 tiers up.
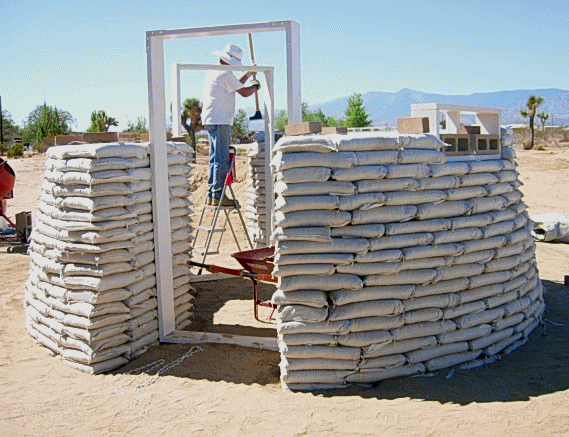
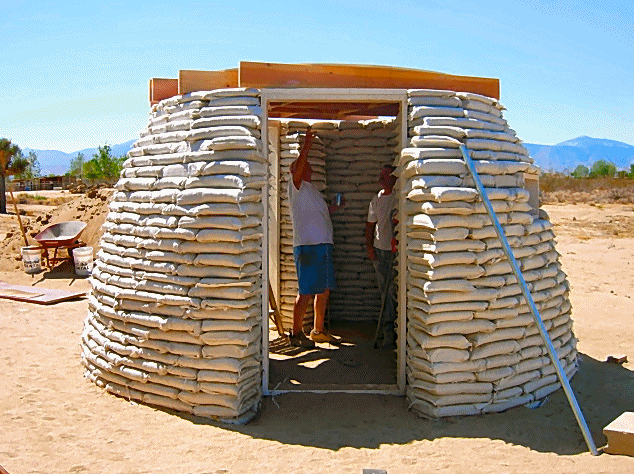
I stood the door frame upright and moved it until the arch chain intersected the top of the door frame and found that I had 1 bag length extra inside the living space, but thats ok - much better than having no bags to support the door. Going to have to get the assembly more level before reaching loft level.
I can see that I'll have to order another 500 sandbags. In an effort to keep the sandbags light enough for me to handle in case My helper quits, I had him try to make them around 5 inches thick. So Its taking more bags than I originally figured. Tomorrow, I'll show him how to get the whole thing back to level. It has to be level higher up.
I tried to explain the principle of accumulative error (add 1/4 inch to each 16 inch long bag for 16 bags and you get 4 inches of error) we struggled all morning and only got close to level. My helper learned how to make fat bags, thin bags, tapered bags and two-level bags.
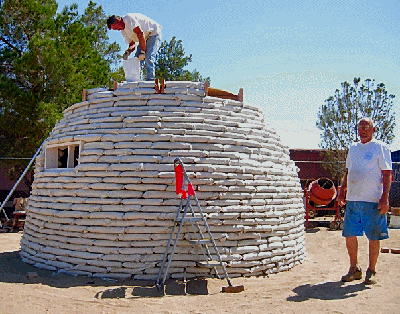
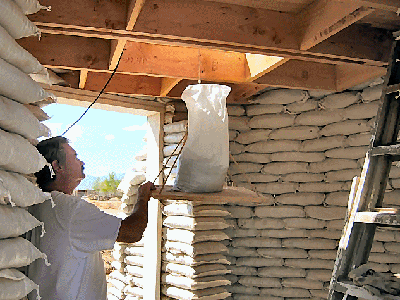
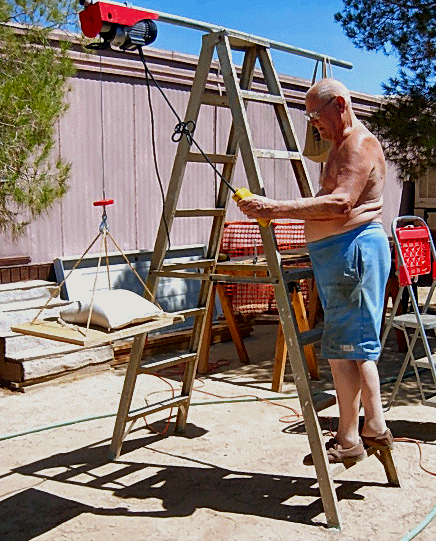
Today was time to install a window for ventillation and to view the North side of the property. The window frame will be completely embedded by tomorrow. The actual window that we bought at Home Depot will be screwed into the exterior face of the frame. It is 3ft long by 1ft tall and has a sliding glass panel and a screen. Yesterday, before quiting for the day, we checked the entire surface of the top course and it was almost perfectly level. This morning it was out of level quite a bit in some areas. The only explanation I can come up with is that as we add more weight in building some of the bags are not compacted as much as others in lower areas and the weight is providing more compaction and this changes the level. Bah-Humbug! One piece of equipment to make things easier is this electric hoist. It will be used for lifting sandbags to the levels up to the 8 foot level. Then after the rafters and floor is installed for the loft, It will be used to lift sandbags up through a trapdoor for installation the rest of the way up.
Yesterday, the wind blew the tarp off the structure. It got under it and ballooned up like a huge parachute. I tried to hold on, but it lifted me off my feet - gave up and let the sun shine on the sandbags. They are treated to UV1600 to resist sun damage, so I hope the wind quits blowing every day at noon. I'll try to tarp it better today.
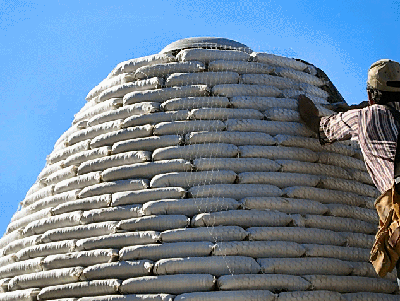
Stringing the barbwire is getting more difficult. I have to hold it as high as I can reach as I walk around and John places the wire under bricks while standing on the ladder. I have multiple wire wounds on my hands, arms and body. Notice that we had to add a 7 ft step ladder.
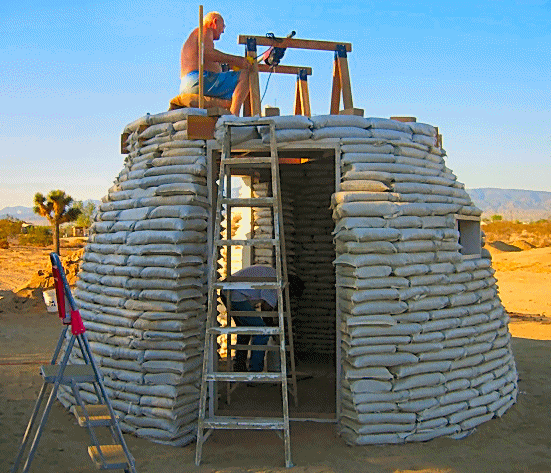
I gave my helper, John two days off while I completed the prefabrication of the loft rafters and the loft floor. The 2X8X10 ft boards for the rafters would be too heavy to lift up 7 feet in the air if they were completely assembled, so I made subassemblies. The rafters, with John's help, were quite easy to hoist to the top and position onto the dome, then the two piece plywood floor was installed and mated by putting the bolt back into the center hole. Then we used a string and plumb-bob through the center hole to align the center of the floor with the centering pin that was driven into the ground and tack it in place. The floor of the loft will be 8 feet in diameter and will have a small hole in the center. The triangle will have a round PVC pin attached to fit in the hole. The shelf brackets will hold it vertical and the attached plates are for reassembly of the triangle - because the triangle will have to be sawed into 3 pieces in order to get it down through the trapdoor when all the sandbags are in place - trapping the triangle inside the loft. The hole in the center is a close fit to the 1" PVC pipe strapped to the loft template. The loft template will govern the placing of the sandbags concentric above the structure below.
Now all we have to do for the rest of the day is fill in the spaces between the rafters with sandbags.
I installed the electric hoist for lifting the heavy sandbags... Climbed up and got ready to lift the bags as John placed them onto the hoist cradle. My electric hoist is really saving time and giving John's back a rest.
As the circle of sandbags get smaller we will be able to complete more tiers in a day.
Placing the barbwire between the tiers is becoming quite a challenge. Where there's a will, there's a way. Soon I'll need a longer stick. It is quite a stretch to get the end of the barbwire up to John.
Took a while but all the bags are in place. The trapdoor to the loft is installed and I'm ready to assemble the roof to the roof vent. The vent is thermostaticly controlled and a little bigger than the picture on the box. Shouldn't have asked my Daughter Sherry to help.
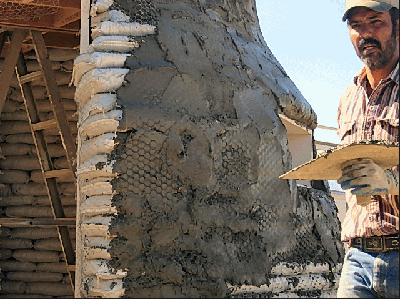
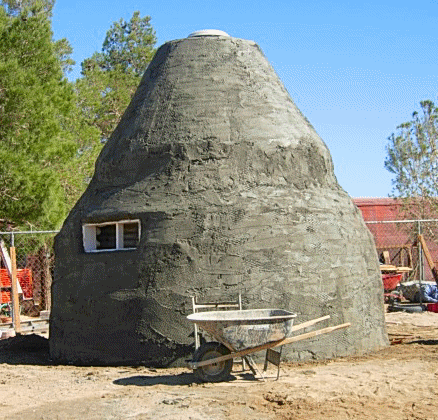
Wrapped section of dome with 1" chicken wire & started to plaster dome with stablized earth mix - 3 parts earth, 1 part Portland Cement and water enough to make paste. Left to cure for 3 days...Installing one section of chicken wire, mixing the mud and applying it to the bottom section took Sherry & me almost 2 days and left us stiff & sore. We had a family discussion and decided to find a Handyman that was skilled in stucco or other coatings.
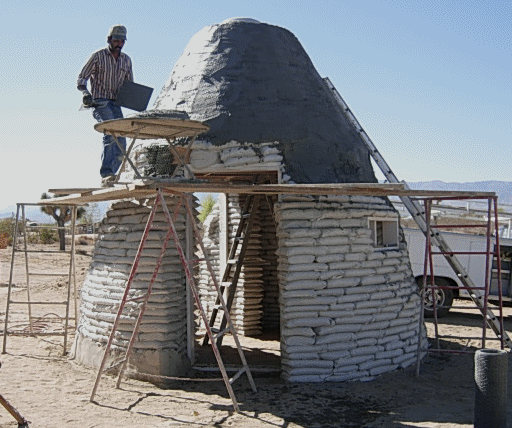
They worked really fast and after 5 hours said they would be back at 7 a.m. to put on the finish coat and cement the floor.
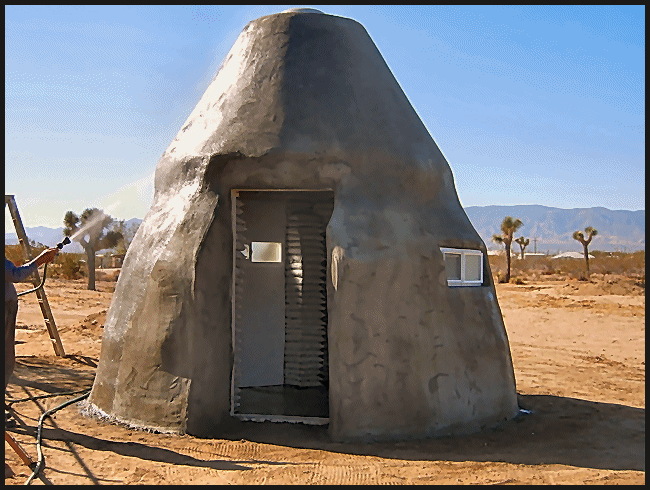
By 7:30 a.m. they had 25% of the finish coating complete and by noon they were packing up to leave. They left instructions to water the dome down every 4 hours for the next week to minumize cracking. Explaining that the large amount of plastic cement was prone to small cracks as it cured.
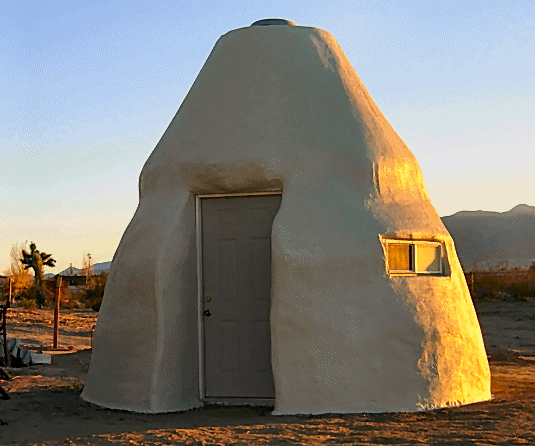
After many delays - weather, finding the right paint and primer and getting into the right mood, we started to paint. The coating had many small cracks and little pits that needed the primer. It sucked up a lot of primer but we managed to finish before dark. We put the final coat of crystal white elastomeric paint making sure to fill any small pits or cracks. It took about 4 hours and it came out really nice. When I look back over this last year, a year filled with natural disasters and all the devastation caused by tornados, I can't stop thinking how a simple dome structure like this could protect folks and their precious possessions. A tornado couldn't do any damage because it has one foot thick walls, weighs 60,000 pounds and has no flat surfaces except for the doors. |
 Recently while browsing the Internet I ran across a web site,
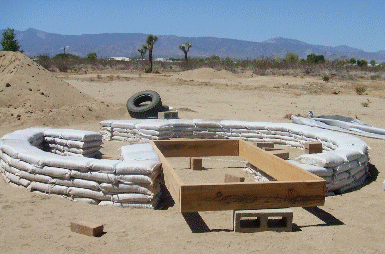 Over the weekend, I purchased an exterior door and enough 2x8 by 8 ft. long boards to make the door frames and window frames. I completed both door frames by placing the cut 2x8s around the door. I controlled the spacing by placing 3/32 thick paint paddles - free from the local hardware store.
The other finished frame is being used to control the opening between the bags being stacked to attach the door frame.
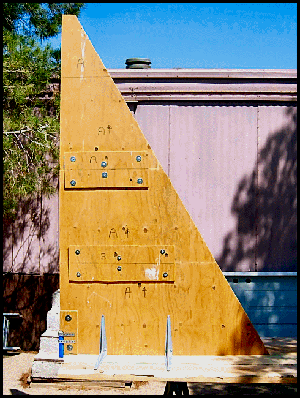 Because of the loft, the chain that controls the arc of the dome cannot be used and the upper portion of the structure will be stronger if the geometry is that of a 60 degree cone. This triangle will control the placement of the sandbags in a concentric circle.