Drawing a Circle
It is necessary to draw an outline for the intended wall at the construction site that follows the plan for what you are building.
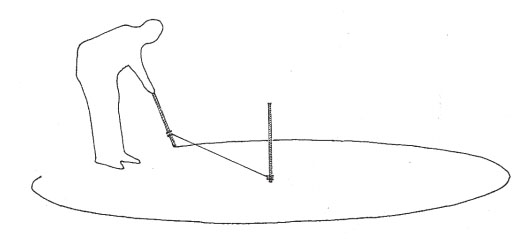
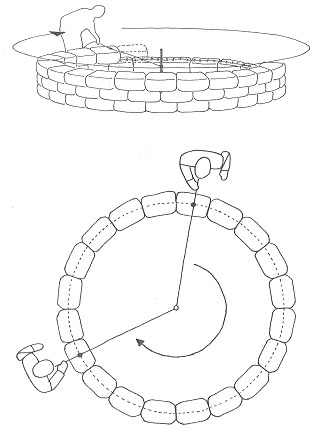
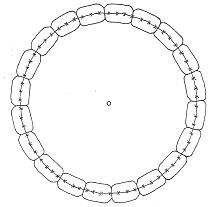
1. Find the center of the circle and pound in a steel post. Tie a rope to the base of the post.
2. Tie a steel pole to the other end of the rope.
3. The length of the out-stretched rope will be the radius of the circle for the shelter.
 4. By stretching the rope, draw a circle with a steel pole attached to the other end of the rope, just like making a circle with a compass. 4. By stretching the rope, draw a circle with a steel pole attached to the other end of the rope, just like making a circle with a compass.
5. The steel pole in the middle of the circle will be used as a guide when piling the earthbags, so it should remain there.
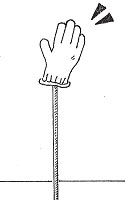
Attention: The circle drawn on the ground will disappear easily, so it is necessary to redraw the circle with colored spray paint. Also, the post in the center can be hard to see and may cause injury, so cover the top of it with a white cloth or wrap it with anything visible.
Drawing a Straight Line
1. Pound posts at both ends of a straight line and tie a rope between them.
Making a Foundation
If you have a site with a foundation which is already well established there is no need to make a new one.
 If the surface of the earth is soft, it may be necessary to compact the soil. If the surface of the earth is soft, it may be necessary to compact the soil.
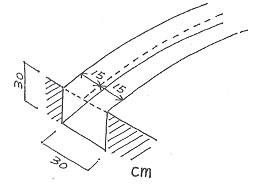
1. Using the painted circle line as a center, draw two parallel lines on either side of it, 15cm (6") each.
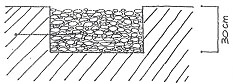
2. Dig a trench 30cm (1 foot) deep, between the paralell lines.
3. Fill the trench with gravel.
4. Compact the gravel with a tamper.
5. Using a leveling instrument, make sure that the gravel surface is level.
 Attention: Keep the dirt that was dug out when making the foundation trench in a pile. This material can later be used to fill the earthbags. Attention: Keep the dirt that was dug out when making the foundation trench in a pile. This material can later be used to fill the earthbags.
 Mixing Cement for Stabilized Fill Mixing Cement for Stabilized Fill
A ratio of 90% earth/sand, 5% water and 5% cement is a fundamental mixture. For consistent density, mix the contents well. If the earth/sand contains enough moisture, it may not be necessary to add water.
Attention: For a simple type of wall, it is not neccessary to mix the cement in the fill mixture. For openings, where there will be higher forces, the ratio of mixture will be different from the one mentioned above. (This will be explained later.)
Filling Earthbags
Earthbags are usually made of polypropylene, however, depending on the region where you are working, you can use cheaper bags, whatever is available. For example, hemp bags for grains or burlap sacks will work.
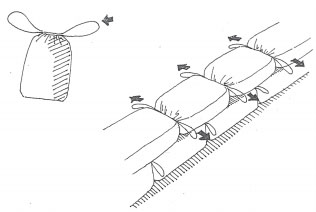 1. Fill the bag with the mixture and close the top by pulling strings (if the bags are eqiupped with strings) or otherwise securely close the open end of the bag. 1. Fill the bag with the mixture and close the top by pulling strings (if the bags are eqiupped with strings) or otherwise securely close the open end of the bag.
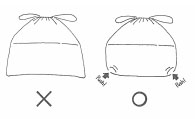
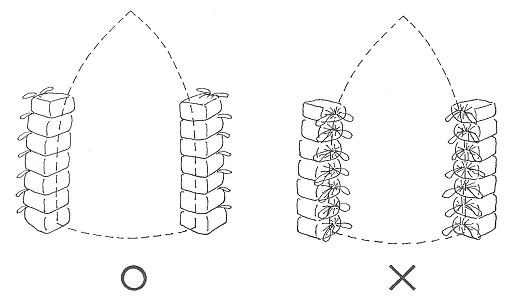
2. Place the bags and make sure that they are tightly lined together. Keep the strings of the bags out (do not hide between the bags); they will be used later to tie the mesh in place when plastering the wall.

3. Lay the bags like bricks, so that the joints of the previous row will not line up with the joints of next row.
 4. Do not forget to poke the corners of bags, so that there will be no pointed corners. 4. Do not forget to poke the corners of bags, so that there will be no pointed corners.
Piling Earthbags Around Openings
1. Add 10% of cement to the mixture instead of 5% mentioned above.
2. For the entrance, pile the bags so that all the bottoms will face outward (not the closed string side).
 Placing Earthbags Placing Earthbags
1. With a circular shelter, measure with a rope tied to the center pole to make sure the radius of the circle is equal.
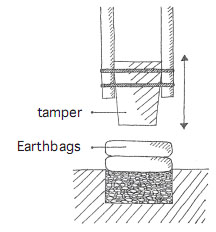
2. With straight lines, as with a circles, after bags are in place it is neccessary to tamp them as to keep the bags tightly in place.
3. After tamping the bags, make sure that the top surface is level by using leveling device.
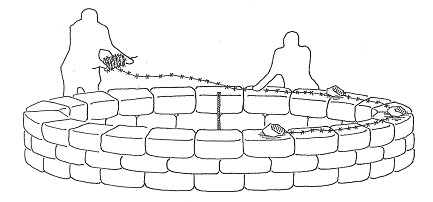
 Placing Barbed Wire Placing Barbed Wire
After each layer, use barbed wire (one or two strands) to hold the bags together.
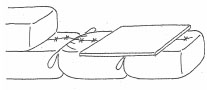
Placing Bags on Top of Barbed Wire
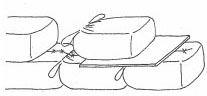
When placing bags on top of barbed wire, first place a slider plate on top of the barbed wire. Then put the bag on top of the slider in the right position without getting the bags ripped up by the barbed wire. This way, you will avoid mistakes, since even if you make a mistake, you can readjust the slider or bag to the proper place.
  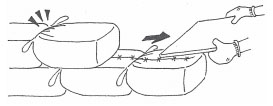
 Continue Piling the Bag Courses Continue Piling the Bag Courses
Basically, just repeat the above process. After laying two courses, check the perpendicular line, using a rope tied with a stone (plumb bob) or a measuring stick.
Adjust the gap by hitting the bags with a mallet to keep the perpendicular line in order.
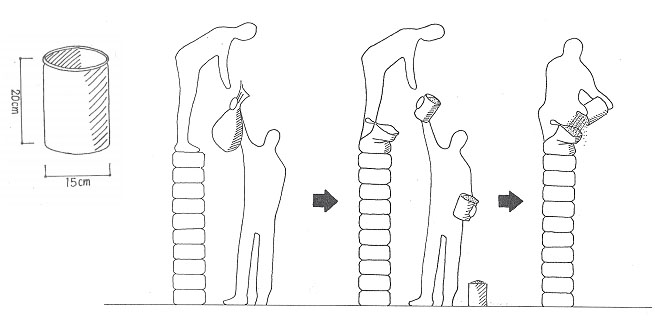
When Placing Earthbags up High
When piling bags high up on a wall, first fill only 1/3 of the bag. The remaining fill mixture should be put in a can and handed to the person standing on top of the pile. It is preferable to fill the bags in position to avoid picking up and moving heavy bags, which may strain your back.
|
