| Puerto Vallarta Model House by Kelly Hart |
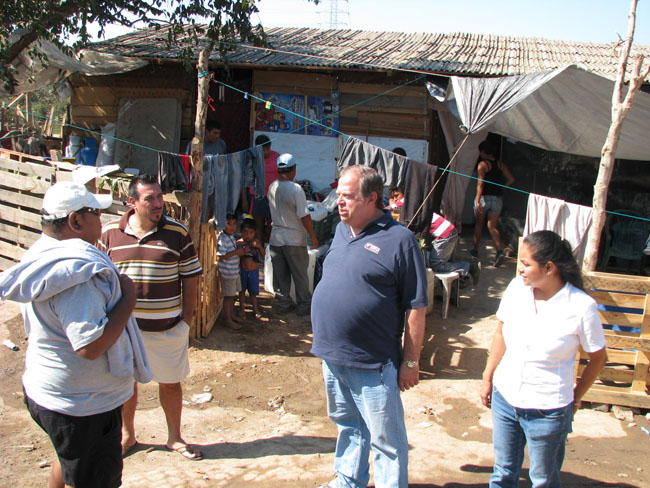
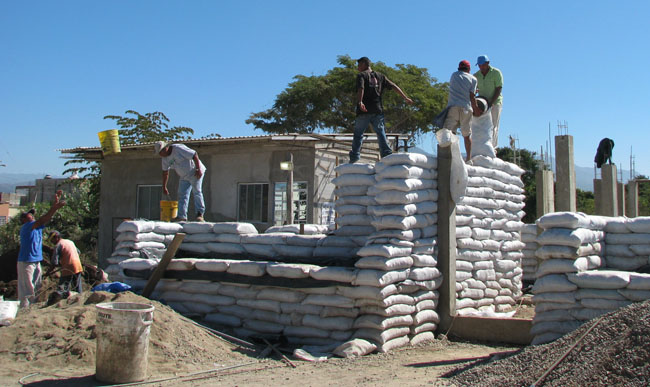
I have been consulting with Mike Parker (shown above in blue) who started Children of the Dump in Puerto Vallarta, Mexico about how to build inexpensive, ecological housing for poor families who subsist off recycling materials from the city dump. They typically live in shacks and shanties that are often not adequate for their needs, nor do they provide proper housing for children who then are not able to get an adequate education to better themselves.
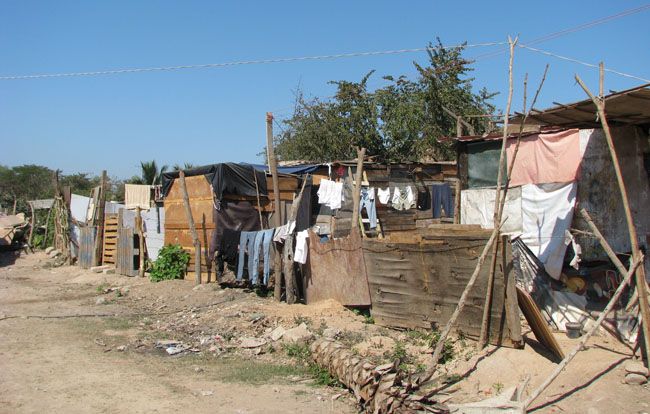
Puerto Vallarta is on the Pacific coast in the tropical zone of central Mexico, where the climate is generally quite hot and humid. These folks cannot afford air conditioning, so they need shelter that will help moderate the extreme heat naturally.
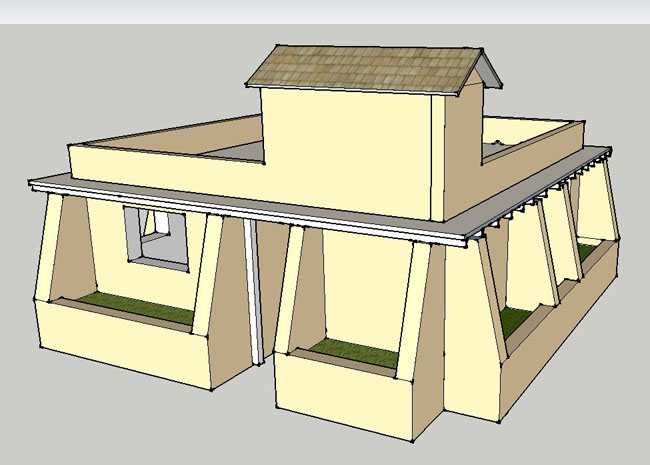
Mike and I have discussed a variety of ways to accomplish this and the design that we came up with should perform quite well in this regard. We are using large earthbags filled with adobe soil that provides both insulation and thermal mass. We are berming most of the structure about a meter high with substantial planter beds. We are insulating the roof with large bags of recycled styrofoam. We provide plenty of ventilation via screened openable windows, a central corridor straight through the house from door to door, and there is an openable stairwell to the roof/second floor. We exclude nearly all of the direct sunlight into the house with large overhangs and buttresses. And the breathable interior walls will help moderate the humidity as well. I think that this model home could serve most any place with a hot, humid climate. The basic look and design of this model was based partially on an earthbag house that was built a few years ago near San Miguel de Allende, Mexico (see this page for more about this home.)
The funding for this project is primarily through donations made from Christian organizations. Some of the workers are directly employed, while others are volunteers. Members of the dump community are volunteering their labor, with the understanding that they will be first in line to receive their own house. The model for this is similar to Habitat for Humanity in the U.S. In fact the size of the model home is based on the average Habitat for Humanity home, which turns out to be larger than average Mexican homes.
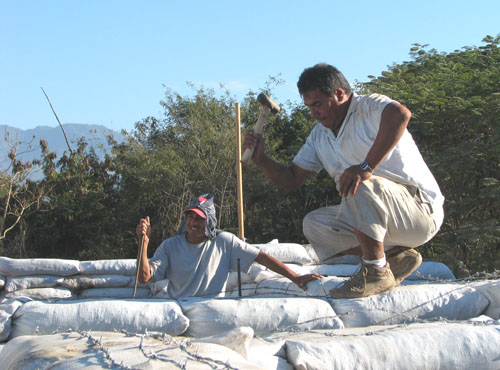
Before I arrived in Puerto Vallarta (in January, 2011), Mike and the workers had already prepared the land, laid out the walls, dug the rubble trench foundation with a French drain, laid down three courses of bags full of gravel, and started laying the walls with adobe-filled bags. All of this was done pretty well, although I commented that some of the bag work could be neater and with more attention to placement in a running bond pattern, like bricks are laid. Also, they might have double-bagged the first course of gravel bags but had not. Some of the buttresses were not well integrated into the adjoining walls. I proceeded to stabilize some of the weaker places with rebar pins driven in at various angles.
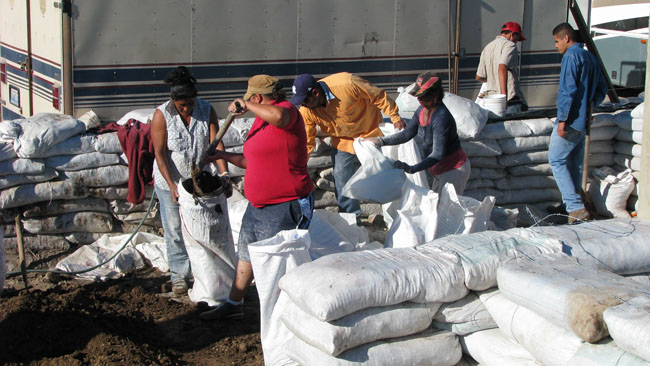
Most the polypropylene earthbags employed were recycled from nearby bakeries. As with most bags used in Mexico, they were larger than is absolutely necessary for earthbag construction, measuring about 22" X 39". The people from the dump community had been saving bags gleaned from the trash for use in their own homes, and these are also mostly the larger ones. This fact means that once the bags are filled with damp adobe soil, they are very heavy, generally requiring two strong people to move them and place them on a wall. I showed them how they can be filled in place, using a bottomless bucket as a funnel and a metal slider to keep them from getting stuck on the barbed wire.
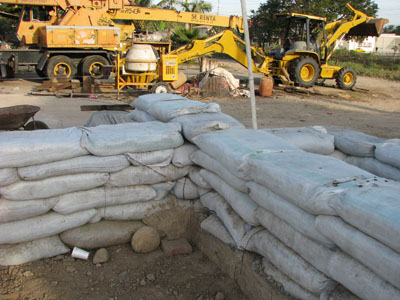
As it turns out, there are actually several advantages under these circumstances for using the larger bags, besides the fact that they are easily available. The walls will be substantially thicker, proving better insulation and thermal mass for comfort. And many of these homes may end up supporting two stories, as is commonly done in Mexico. Lino plans to eventually build a second story on his house. The thicker walls will be more stable and provide better support for a second story.
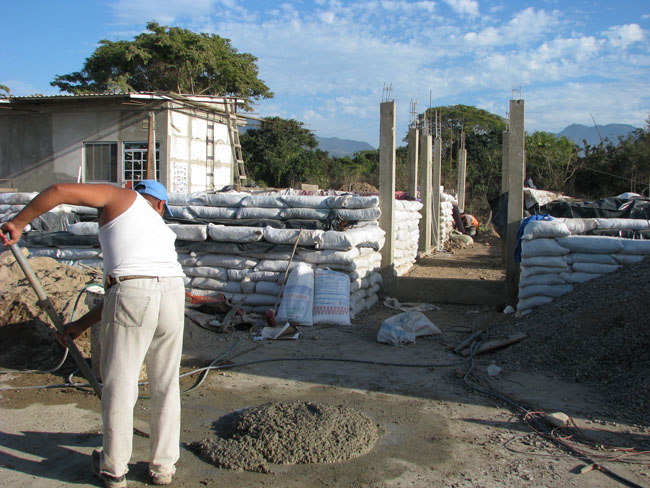
Earthquakes are not common in the Puerto Vallarta area, but they can happen, so there is always the concern of building structurally reinforced building that could withstand shaking. Standard Mexican construction takes this into consideration, using confined masonry techniques with steel-reinforced columns and bond beams that frame the common brick or concrete block construction. Mexican laborers are entirely accustomed to building this way, so this what we decided to use in framing doors and windows and creating a bond beam.
Most of the assistance from the dump community were women and they were more comfortable preparing the soil and filling bags and buckets than placing the bags on the walls, cutting and placing barbed wire, and tamping the bags once on the wall.
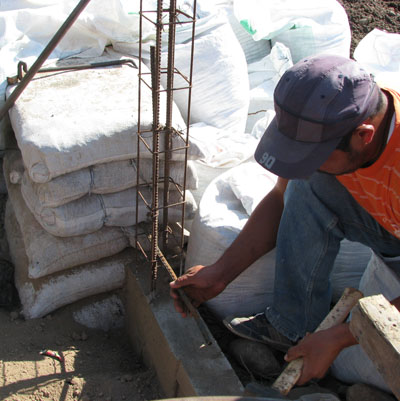
To help stabilize the walls, we periodically drove long sections of rebar vertically down at critical locations. We also connected the precast columns for doors and supports for the central bond beam with pieces of rebar that were embedded into the concrete by drilling holes first. I would have preferred that these columns had been cast after the bag wall was up, so that it would be easier to simply drive pins into the bags at intervals and pour the concrete around them, but most of the vertical columns had already been created by the time I arrived.
Communication with the crew was often a challenge. I speak a fair amount of Spanish, and can usually make myself understood, but it is not always easy to understand what is being said in Spanish. Sometimes translators were present to help with this, but they may not be fully aware of construction terms either.
Another challenge is that Mexican laborers tend to be accustomed to doing things in certain ways, and have a great deal of experience in doing so. They may not take too kindly to a foreigner showing them alternatives. For instance, most concrete and stucco is mixed on the ground, and the workers are convinced that this is the most efficient way to do it, and for them it may well be. Mike had bought a large gas driven cement mixer, thinking they could use this to mix soil and water as well as concrete and stucco. The workers basically refused to use it.
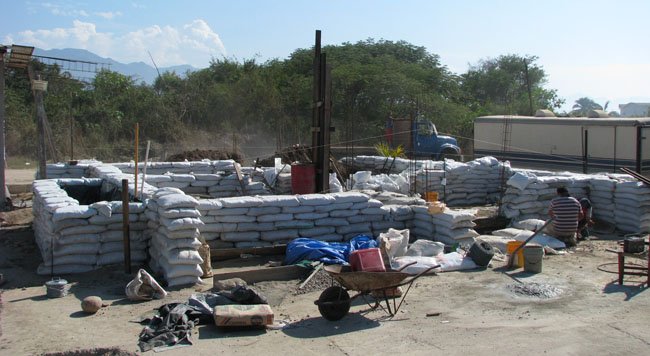
As the walls grew higher, I was pleased to see that the crew had organized themselves into an efficient team that mixed soil and water into buckets on the ground, and then bucketed the damp soil up to several people working on top of the wall. One person held the bag, while another dumped the soil and another came along behind with the tamper. Another team of two was cutting and placing barbed wire and plaster mesh ties in preparation for more bags in another location.
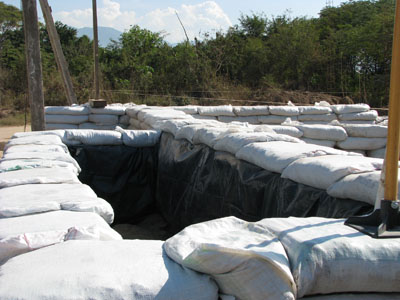
The planter beds were created by connecting the buttress walls with a wall between them to enclose the space. All of these walls were lined with sheets of heavy polyethylene plastic as shown in the above photo. This should keep any moisture from migrating into the wall or building. The bottom was kept open to the ground below and drain rock was thrown in to assist drainage.
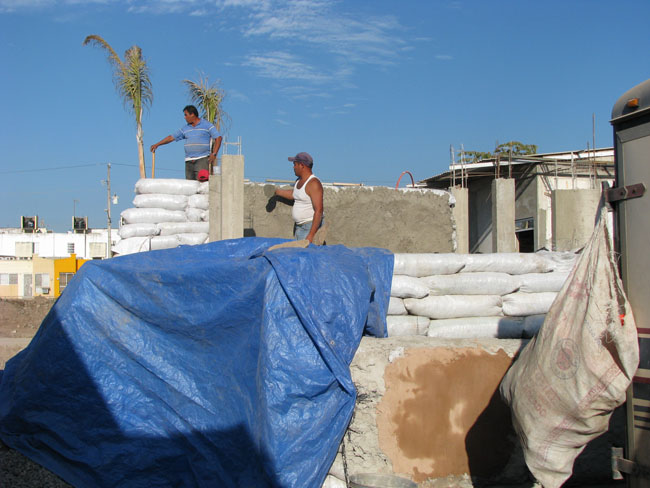
For exterior plaster we decided to conform with what is commonly done in Mexico, using a basic stucco mix of cement, sand and a small amount of acrylic bonding agent to make it more waterproof and adhere better to the bag material. Before applying this stucco, the walls were prepared with 2" chicken wire mesh attached to the wall with either wire ties that were placed across the bags during construction or with stiff wire staples pounded into the bags. For a color coat we mixed finely screened sand with cement and oxide colorants, and you can see in the above sample our first attempt at coming up with a color we like. This represents about 1 part red with 2 parts yellow colorant.
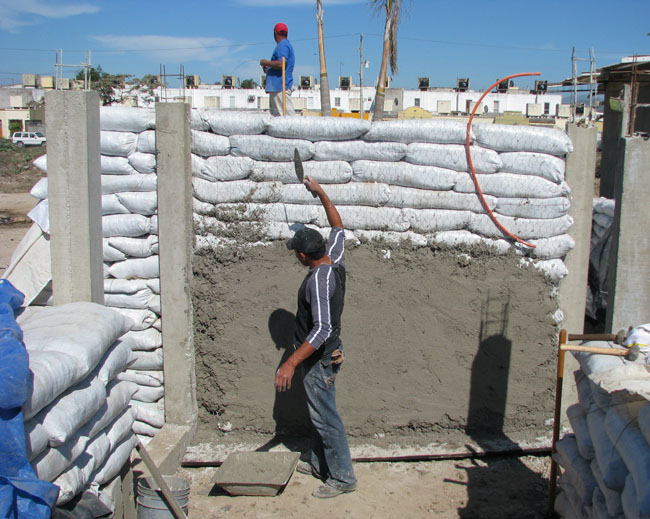
For an interior plaster I recommended using a lime plaster made from hydrated lime, with about 1 part lime to 6 parts sand. If they eventually want to paint this, I suggested simply using a lime wash that can be colored with the same oxide colorants. This should keep the interior walls breathable, which is important for several reasons. The moisture in the bagged soil needs to be able to release over time, and the earthen walls can moderate the humidity in the air. If the lime wash is too dusty, a very small amount of acrylic additive can be used. In the above photo you can see a section of orange tubing that is conduit for an electrical box. Most of the electrical circuits will be routed through the ceiling.
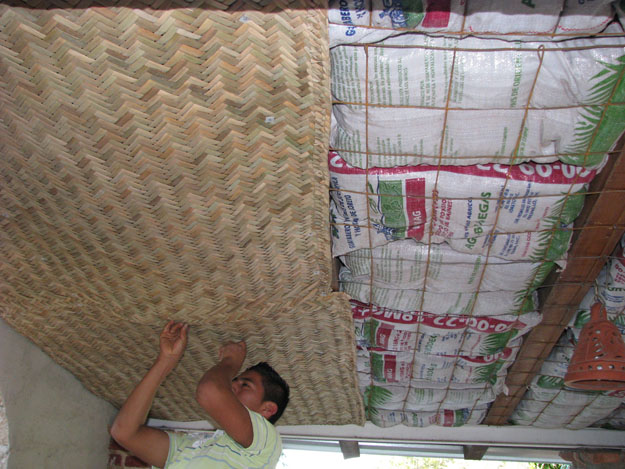
Eventually the ceiling can be insulated by using bags filled with styrofoam bits created by running recycled Styrofoam through a small electric leaf shredder. The spacing of the rafters was set so that the large bags would fit perfectly into the ceiling cavities. These bags would then be held into place with some wire mesh and then covered with reed mats or something similar to provide a finished ceiling, as shown in the above photo.
We had hoped that my two-week stay at the work site would allow me to help create the bond beam and get started on the roof, but I ran out of time before this could occur. I soon realized that my time would be best spent conceptualizing and diagramming the entire project design so that I could go over this with the primary supervisors who would be continuing to work on this project, as well as future ones.
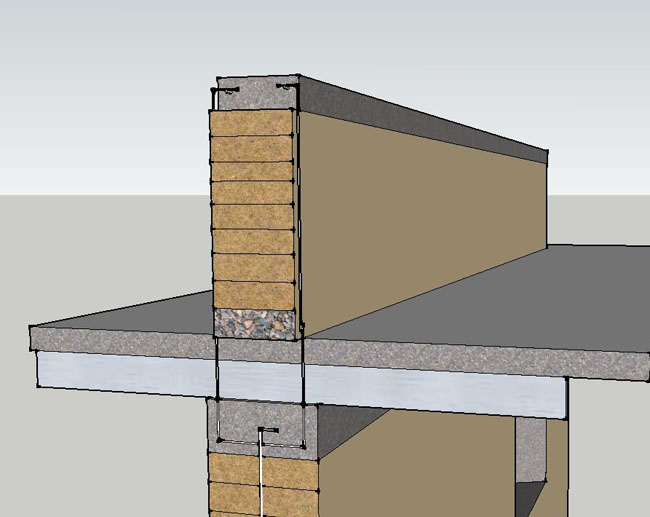
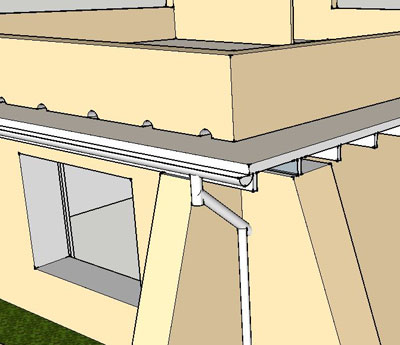
This is when I came up with the above diagram, which shows exactly how to construct the walls, bond beams, roof rafters, roof/second floor platform, and the parapet/second story walls. What this shows is how rebar pins with bent tops are driven every 32" (80 cm) about half way down through the bag wall, with several inches extending above to get well embedded into the bond beam. Running horizontally along the bond beam are two parallel #4 steel rods, as is shown in the specifications provided by Precision Engineering. A U-shaped bracket of #4 rebar is also embedded into the bond beam next to the vertical pins every 32" (80 cm), as it would be in the specifications for the concrete foundation. This U-shaped bracket extends above the bond beam about 15" (38 cm) which allows the later placement of 2" X 6" C-section steel rafters adjacent to them (which can be welded to the rebar to keep them vertical and in place and further tie the structure into a rigid configuration.) Resting on the steel rafters/floor joists is a reinforced concrete poured roof/second story floor about 4" thick, as is commonly done in Mexico. Above the concrete deck can be laid the base course of gravel-filled earthbags (smaller than those used below) that will support the soil-filled bags for the parapet/second story wall. Once this wall has reached its intended height, a second bond beam can be prepared with bent #4 rebar as is shown in the specifications. The U-shaped bars can be coupled with the upper vertical bars with one of the approved coupling methods shown in the specifications. I suspect the Mexicans will weld these together rather than try to locate any of those coupling devices.
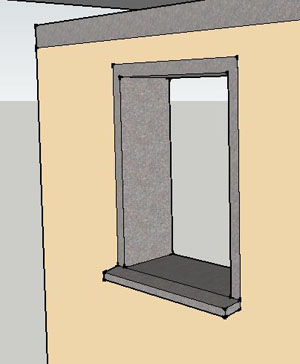
Standard commercial double pane, openable windows were purchased for this project. With these precise measurements, we were able to lay out the window openings with exact dimensions, so that reinforced concrete frames, the same width as the bags could be formed in place, as shown in the above diagram. Rebar pins firmly connect adjacent bags with the concrete frame.
In order to provide drainage off the roof, the entire first bond beam should be inclined downward several inches toward the rear of the house. This will make the rafter/joists and the poured concrete roof follow the same angle. Drainage ports can be built into the parapet wall to allow proper flow of water off the roof. In addition to this, we provide a gutter at that end of the roof with downspouts that can either direct the water into the French drain system or into cisterns for later use. The roof deck will recieve several coats of a common Mexican white sealant roof paint.
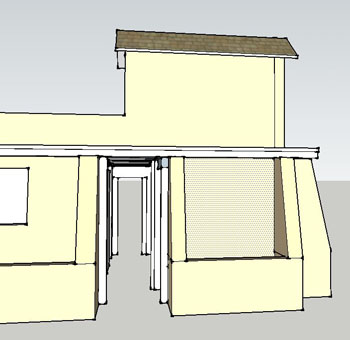
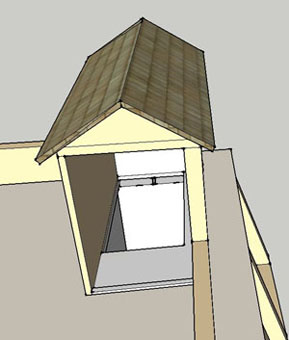
An enclosed stairwell is provided in the vestibule/entry that goes up to the roof/second story. This could be enclosed with at typical palapa structure, common in Mexico, or roofed in some other manner. Basically what this has created is a design for a reinforced two-story earthbag building that might pass code standards for most seismic zones around the world, although I cannot guarantee this. In this particular building, the lower story walls are not reinforced the way they would be according to the specifications, but those walls are heavily buttressed and have been reinforced with periodic vertical rebar, and tied at the bond beam with steel rafters/joists. They also have the barbed wire and the plaster wire mesh as specified. This will be a very solid building that should withstand most forces it will likely encounter during its life.
|
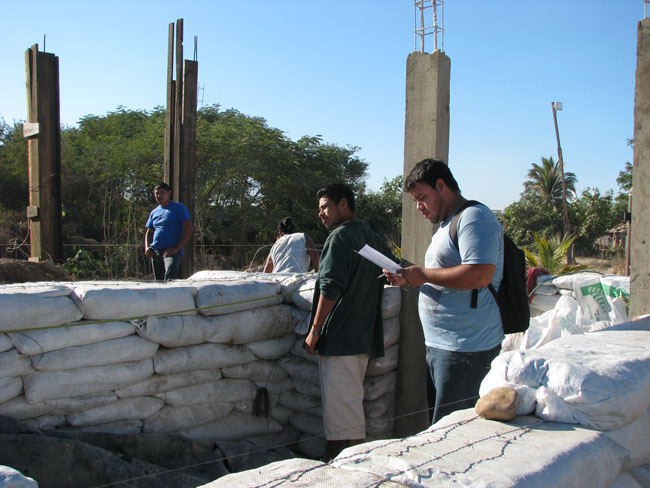
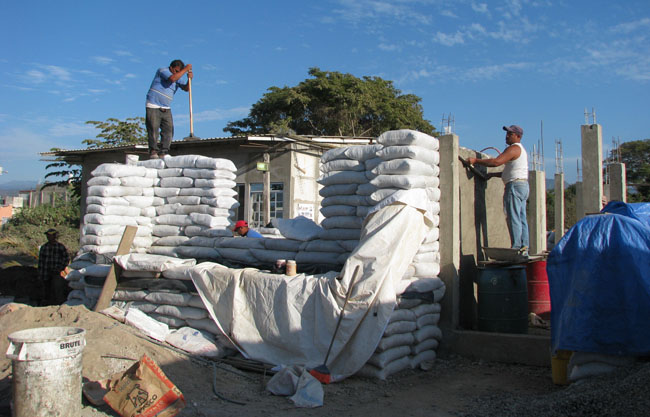
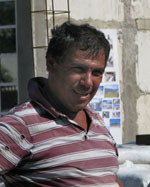 Mike's intention is to eventually provide housing for the dump community, but first he needed to build a working model on property that is secure in its title. So an arrangement was made to build the model on property belonging to Lino (photo at left), who runs a crane business in Puerto Vallarta. Once the model is complete, it will eventually become Lino's home.
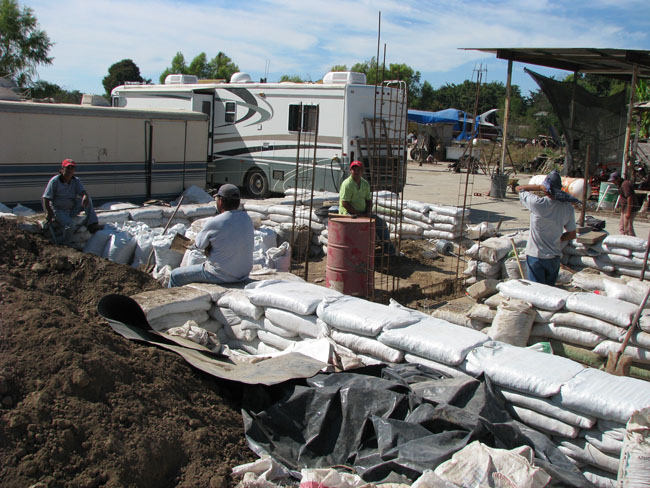

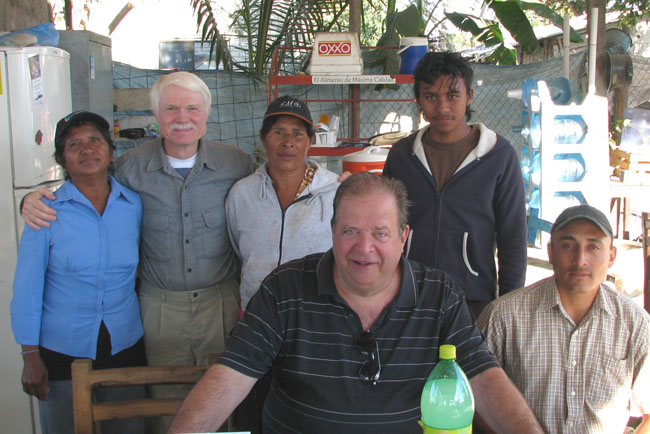
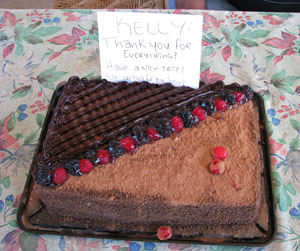 On the morning of my departure, I was surprised by a lovely and tasty chocolate cake and a note thanking me for all of my help with this project. You can see me in the above photo embracing two of the women from the dump community. In the foreground is Mike Parker, without whom none of this would be happening, and Ricardo, one of the supervisors being trained to carry on this work on other projects. Everybody was invited to share in the cake, and we nearly consumed it all. This will be a memorable experience for all of us, I'm sure!